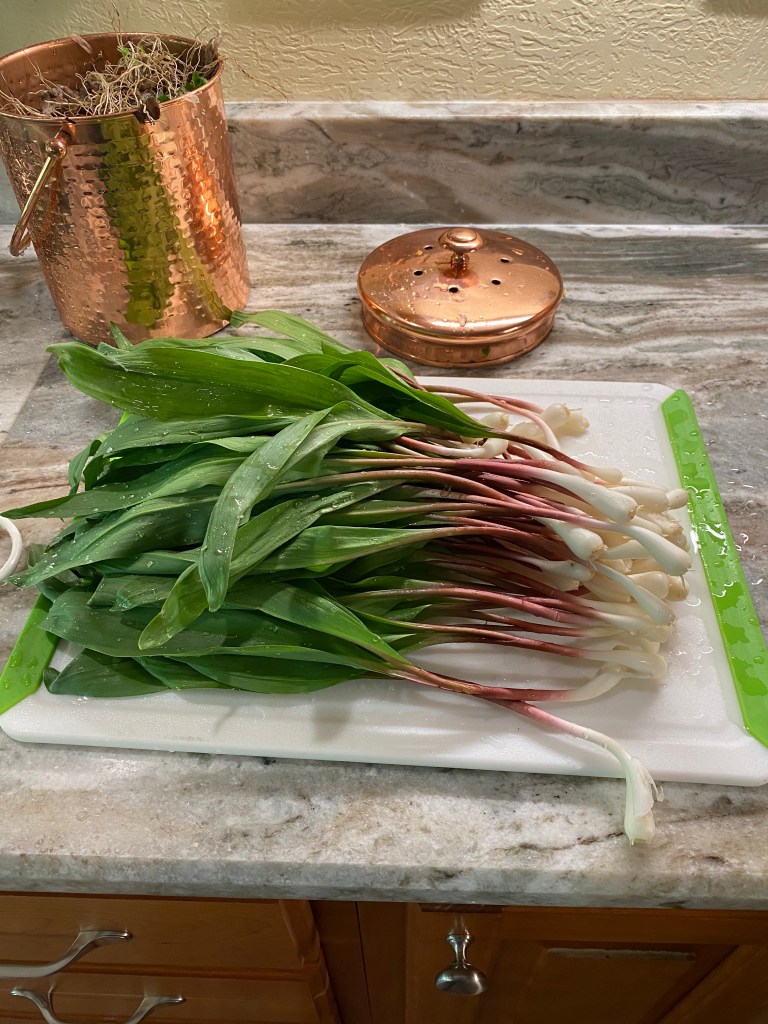
I swore I would never eat ramp jelly. Then it showed up on my ice-cream at my favorite new local restaurant. It tasted beyond my expectations into the realm of amazing. Could I find a recipe? No! Nowhere! I’m sure recipes must exist but I couldn’t find one. So I made this one up cobbling together ideas from several recipes including one I’m sure was never really cooked. Or if it was cooked, it should not have been, because it called for 2 lbs. of these tiny spring jewels. That’s a mountain of fresh ramps, which would cause an extinction of ramps if many people did it. That’s enough to overflow my biggest cooking pot. So be careful with those recipes that call for you to harvest more than your share. There is no need to substitute equal weights of ramps for chopped sweet onions. OMG, ramps are way stronger.
Preparing the ramps for chopping
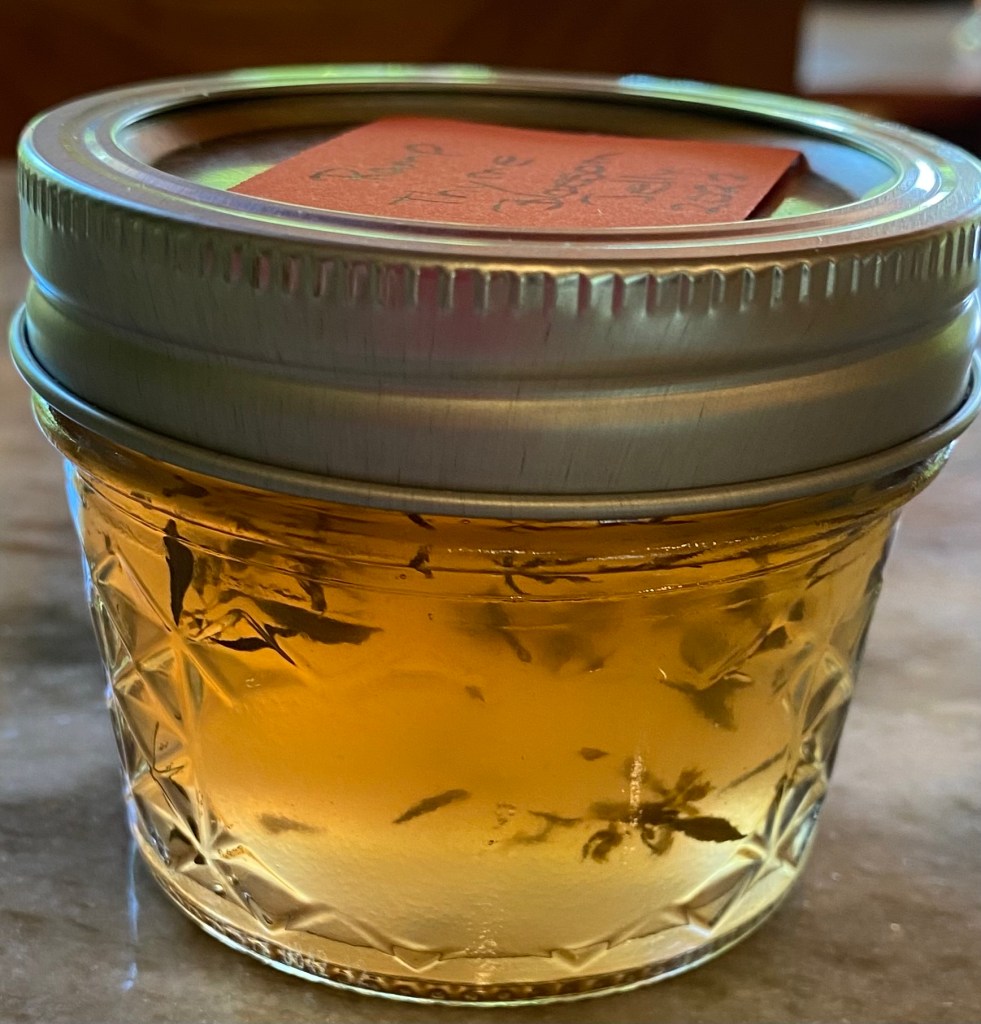
Ann’s Ramp Thyme Jelly Recipe
1 lb. ramps cut into fine pieces
1 tsp olive oil
3/4 tsp salt
2.5 cups (or more) water
3/4 cup organic rice vinegar
3 Tbs fresh picked thyme leaves and flowers
5.5 cups sugar (no kidding)
Make the juice first. Combine the chopped ramps and olive oil in a large pot and stir on low heat to release the juices. The leaves and white parts should be wilted and soft. Once they have reached the stage of cooked but not browned, add 2.5 cups of water. Bring to a low boil for a minute. Remove from heat and let cool enough to strain the mixture through a jelly bag. I strain it two or three times to get clear jelly. Measure the juice and add water to bring volume to 3 cups.
Make the jelly next. Combine the juice, thyme and vinegar in a large clean pot and bring to a boil. Add 1.75 oz. pectin*, stirring continuously to dissolve it completely. Bring to a boil. Once pectin is dissolved and mixture is boiling, add the sugar. Stir continuously to dissolve the sugar and bring to a boil yet again. Let it boil hard for one minute. Remove it from the heat and start the canning process. This makes about 13 four oz. jars. Use standard hot water bath canning methods, boiling for 10 minutes. https://www.healthycanning.com/water-bath-canning-step-by-step It makes a beautiful pinkish gold clear jelly with little thyme leaves and blossoms floating around in it if it turns out perfectly. Good luck!
*I had the best luck with Ball Realfruit Classic Pectin dry pectin. When I used the pre-measured Original Sure Jell Premium Fruit Pectin, the thyme floated. Go figure (still tasted amazing).
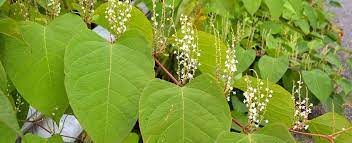
I love this hated weed in the spring. It is easy to harvest, hard to mix up with anything else, and tastes great in so many recipes.
We brought it here to the US from Japan in the late 1800’s because rich folks liked the way it looked as an ornamental on their estates. Now we are suffering because is grows in thick clumps and takes over where native vegetation used to thrive, AND it lets erosion happen right underneath it while it towers over head. It is hard to kill. It’s thriving in most of the states in the US. So let’s cut it down while it’s tender and tasty and eat it as a way to get rid of some of it. It’s a slow method but at least we are doing something. And, when it’s cut down, it sprouts back giving you another flush of tender shoots extending the short harvest season.
I find a stand of young knotweed shoots that look like the picture below and pop off the stalks near the base. You should hear a distinct pop when the shoot breaks off signaling it’s ready to pick. If it’s too old, it will just bend. Forget those. They are too tough and stringy to use. It’s possible to gather enough knotweed to be up to your eyeballs if you are not careful. Then, you have the problem of disposing of it. Don’t just throw it in the trash. If you happen to gather some roots, it will start to grow right there in your trash can and out the door before you throw it out. OK, maybe an exaggeration, but it will grow wherever it lands, so be careful. I’m also careful not to harvest it along roads where car exhaust lands on it all day.
To prepare the stalks for cooking, I fill the sink with cool water, drop the stalks in, and then one by one, wash them, take the leaves off and line them up on a cutting board for cutting in batches. It’s slimy. When I have a cutting board full, I cut them in 1 inch sections and throw them in a large pot. Once here, it’s possible to go many different directions. Muffins, breads, soup, pies, jelly, or simple syrup. I make sure to stock up on this simple syrup. It’s a kid pleaser as a lemonade or seltzer. It is one of my favorite cocktail simple syrups. The flavor is unique yet reminiscent of lemons.
This is what it looks like when you can cook with it.
Japanese Knotweed Simple Syrup
4 cups cleaned and prepared knotweed stalks chopped into 1 inch sections
4 cups water
4 cups white sugar
1/2 lemon fresh squeezed juice strained through jelly bag
Bring knotweed and water to a boil in a medium large pot. Cook simmering for 10 minutes or until the stalks fall apart easily. Strain the mixture through a jelly bag several times. The liquid is pale pink and cloudy no matter how many times you filter it. *Save the pulp for another recipe by freezing it. Measure and return the liquid to a clean pot. Add the sugar in equal amounts by volume to the liquid. Four cups is an approximation. It depends on how much liquid you leave in the pulp. Stir the liquid and sugar over medium low heat until the sugar dissolves and the liquid boils slowly for about a minute. Add the lemon juice to enhance the lemony flavor if you wish. I filter the fresh squeezed juice through the jelly bag just out of habit, but the cloudy nature of the syrup doesn’t warrant that. At this point, you may can this syrup for a long shelf life using standard hot water bath canning procedures for 10 minutes. https://www.healthycanning.com/water-bath-canning-step-by-step Or, you can keep it in glass jars with lids in your fridge for immediate use. I have had this syrup last over 6 months unopened in my fridge. I do not guarantee this though. This syrup is one of my favorites for general gifts and use because the taste is guaranteed to please.
Japanese Knotweed Simple Syrup
I usually have enough knotweed juice to make more liquid than I need for the simple syrup. I will often put it in the fridge until I can turn it into jelly in a day or two. Here is the recipe for jelly. It’s a crowd pleaser too.
Knotweed Jelly Recipe
2 cups knotweed juice prepared as above before adding the sugar
1.75 oz. powdered pectin
2 cups of sugar
Pour the knotweed juice into a clean medium pot. Bring to a simmer. Add the pectin and stir until it is completely dissolved. Bring the mixture to a boil while stirring constantly. Stir in the sugar and bring the liquid to a full boil. Boil hard for 1 minute while stirring. Pour into your clean pre-prepared canning jars and top with prepared lids. This makes about 6 or 7 four oz. jars. Use standard hot water bath canning methods, boiling for 10 minutes. https://www.healthycanning.com/water-bath-canning-step-by-step I will often double this recipe and it still works well.
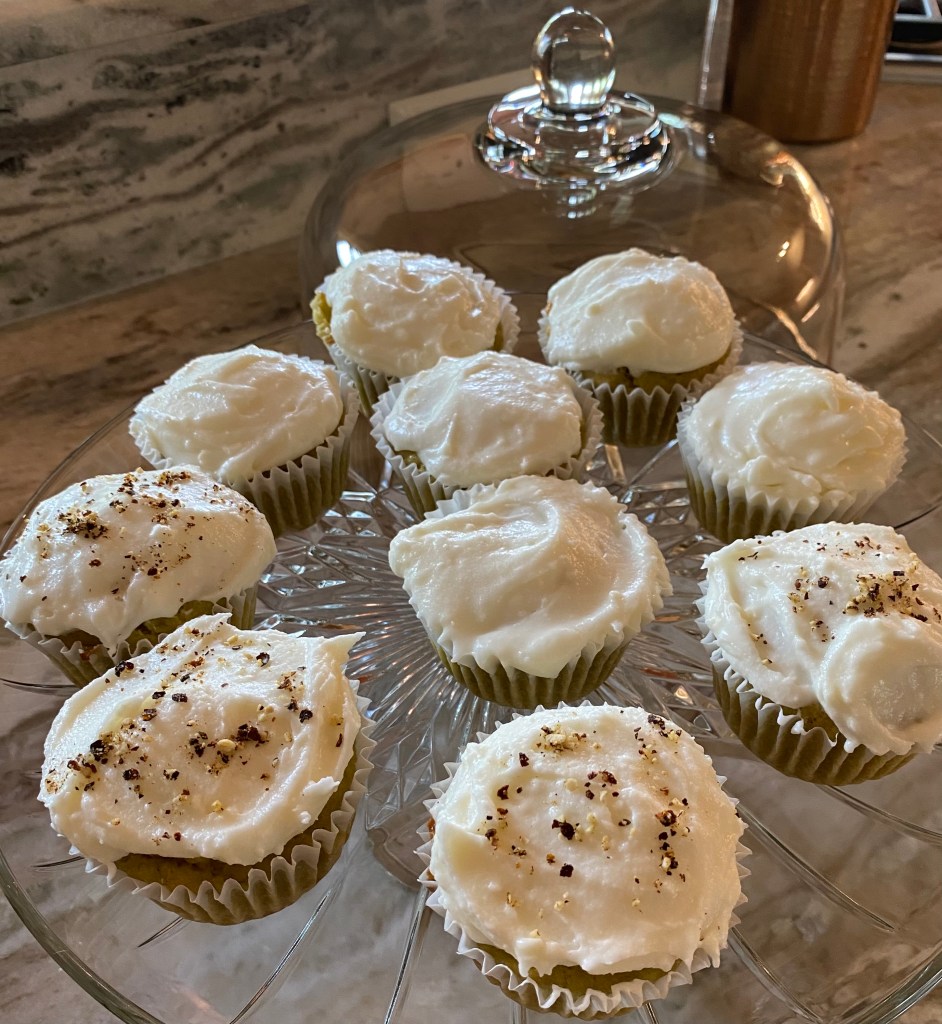
Ellen Zachos’ Knotweed Cupcakes with Ann’s twists
Knotweed Cupcakes with Ann’s Knotweed Buttercream frosting and Spice Bush Berry Sprinkles
Ellen Zachos wrote this wonderful book called “The Forager’s Pantry” which is full of recipes. I have trouble following recipes. This is the result of that problem. But the outcome was fabulous so the original recipe had to be too. This yields about a dozen dense little cupcakes that pack a wonderful complexity of flavors. You will need the *Knotweed Puree (find asterisk for that info) and the Knotweed Simple Syrup described above. The Spicebush berries are always in my freezer frozen from my harvest the previous fall. They are a mainstay in my spices, but you can use clove, ginger, cinnamon or your other favorite cake spice instead. IF you haven’t a clue what I’m talking about, and you are adventuresome, next fall, you MUST gather the Spicebush (Lindera benzoin) red berries and dry and freeze them for Appalachian Allspice – my favorite local spice.
6 Tbs. knotweed puree (sweetened to taste)
2 Tbs. butter, softened
1/2 cup sugar
2 Tbs plain full fat yogurt
1 egg
1/2 tsp vanilla extract
3/4 cup all-purpose flour
1/2 tsp baking powder
pinch of salt
Prepare the knotweed puree. My knotweed was frozen before being pureed and unsweetened so I thawed it, pureed it and sweetened it to about applesauce sweetness. I could have gone with less sugar and been fine.
Prepare the cupcakes. Preheat oven to 350oF. Prepare a cupcake tin for a dozen cupcakes by either using cupcake liners or greasing each cup in the pan thoroughly. Cream the softened butter with the sugar until pale and evenly smooth. Beat in the knotweed puree, yogurt, egg, and vanilla. Combine the flour, baking powder, and salt in a separate bowl, mixing thoroughly. Add the dry ingredients to the wet ingredients and mix until just combined. Pour into the cupcake pan filling each cup 3/4 full. Distribute any remaining batter evenly between the cups. Bake about 20 minutes or until toothpick comes out clean. Cool for 5-10 minutes and remove cupcakes from the pan. Cool completely on a wire rack before icing.
Prepare the Knotweed Buttercream Icingfor 12 cupcakes
1/2 lb. confectioners’ sugar
1/4 cup unsalted butter
1/2 tsp vanilla extract
2 Tbs milk
2 Tbs Knotweed Simple Syrup (see recipe above)
1/2 tsp ground Spicebush berries (optional)
Mix all ingredients and whip icing thoroughly and rigorously until it holds a peak. If you’ve whipped it and it still isn’t stiff, add confectioner’s sugar little by little until the peaks no longer flop over. Ice your cupcakes and decorate with sprinkles of crushed or ground Spicebush berries (or cinnamon, ginger, or your favorite cake spice or nothing). Enjoy and tell me what you think.
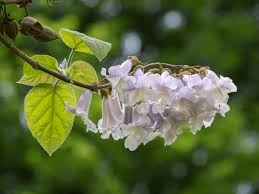
Paulownia Tree, the tree with the large purple flowers that grows along the roads and railroads was brought to the US in the mid 1800’s as an exotic ornamental. Back in the day, China used the seed pods as packing peanuts for shipping china before we realized that the billions of seeds inside those “packing peanuts” were growing into trees alongside our rivers, roads and railways. Now we don’t like it. Paulownia is a pest popping up everywhere. It is one of the fastest growing trees in the world. Medicinal uses for different parts of the tree go back centuries in China. The flowers alone have a history in treatment for acne and toe fungus. But that’s not why I’m sharing my tips with you. Here’s the cool part. The flowers are edible raw. You can put them in a salad. Or you can cook them and make a tasty syrup. The flowers are purple, yet their syrup is amber. To make things easy, the fragrant flowers float from out of reach, high above, down to the ground and lie waiting for you to pick them up. In minutes you can easily gather a quart of fresh flowers from a good patch of Paulownia.
Paulownia Simple Syrup
Paulownia Syrup Recipe
4 cups freshly fallen flowers
4 cups boiling water
4 cups white sugar
1/2 lemon’s juice strained through jelly bag
1/2 tsp vanilla
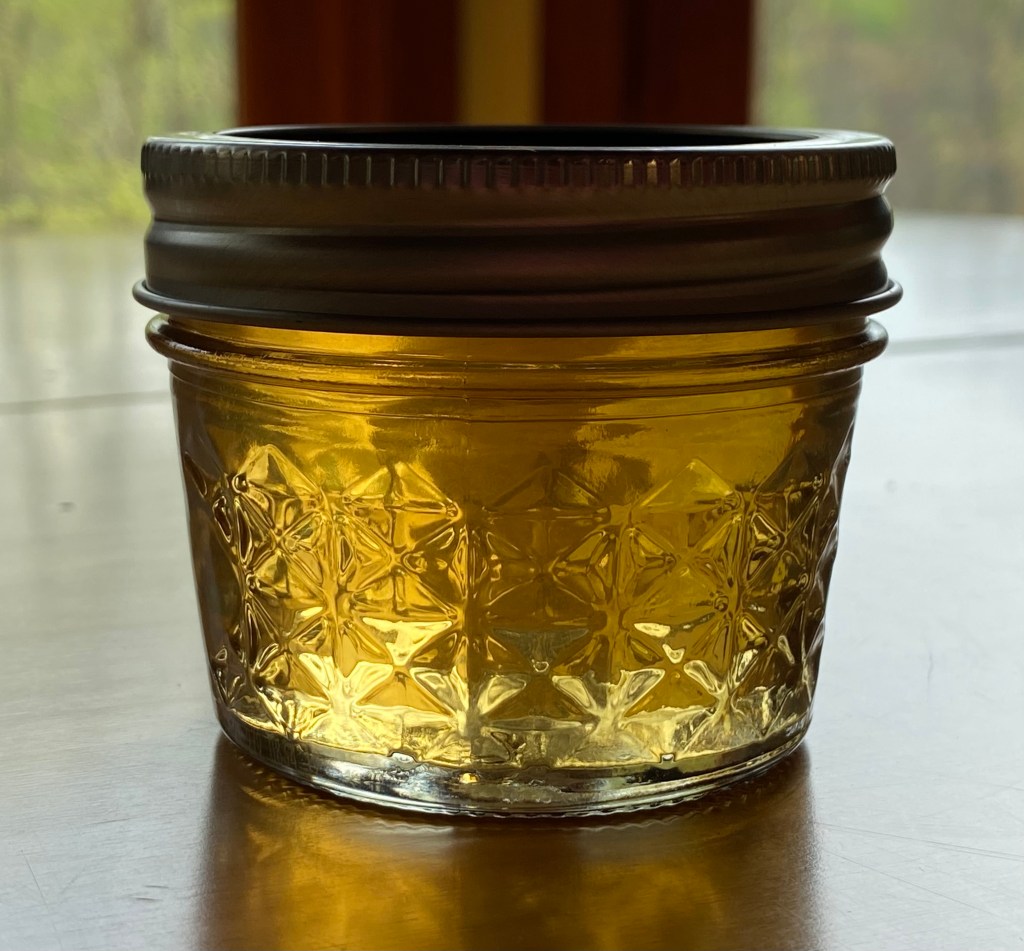
Collect flowers and lightly wash the bugs off if you must. I gently pick through them instead of washing them to preserve the nectar and pollen for flavor. Put flowers, brown base and all, into a large bowl and cover with boiling water. Sink the flowers under a small plate put into the bowl to keep them under water. Let stand for 24 hours. The water will turn amber. The next day, strain the amber liquid through a jelly bag and measure to make sure you have 4 cups (adjust sugar amount to match the liquid amount if not 4 cups). Strain through jelly bag again to ensure jewel toned amber syrup. Place liquid in pot. Add sugar, lemon and vanilla. Stir over low heat and bring to simmering boil to make sure the sugar is dissolved. Taste the deliciousness and adjust the lemon and vanilla if you wish for more. I like it with these amounts so I can taste the exotic flavor of Paulownia. This makes about 8 cups. Can in jars of your choice for 10 minutes using standard hot water bath canning practices. https://www.healthycanning.com/water-bath-canning-step-by-step. Or skip the canning and refrigerate your syrup for immediate use. It keeps in the fridge for weeks.
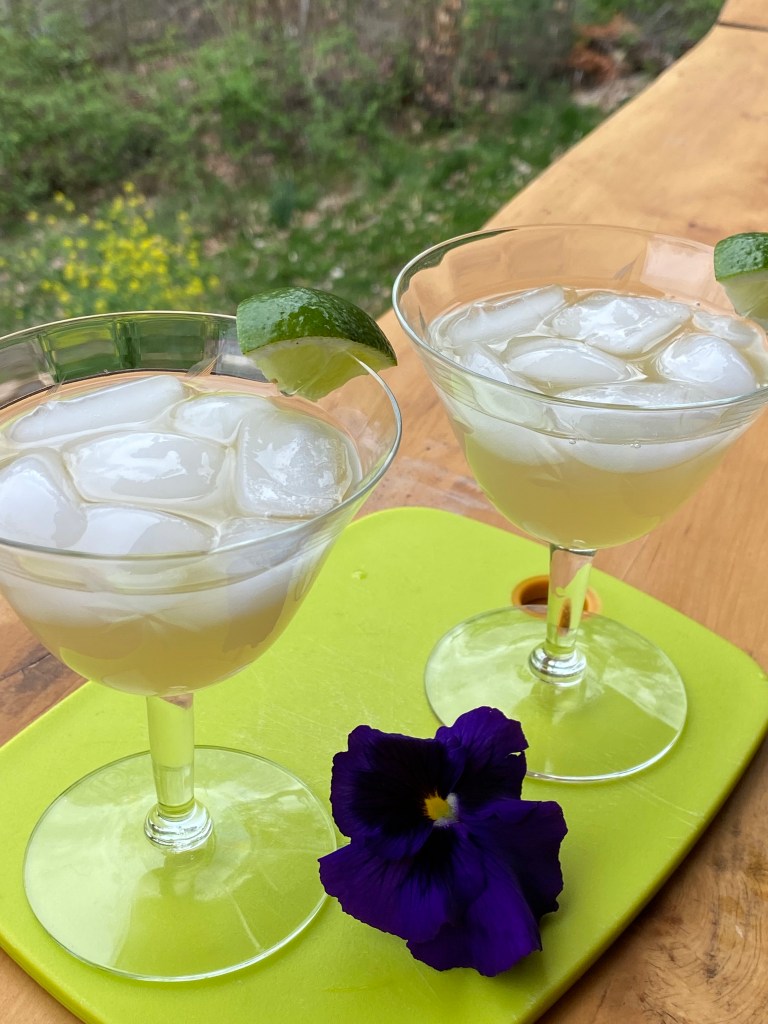
This syrup works over ice cream and as a seltzer water flavor. I make a one of a kind margarita with mine by following the mocktail recipe below and substituting 8 Tablespoons Tequila for the water. I also salt the rims of the glasses pictured. It’s mighty tasty. For general use, I just substitute this syrup for sugar or simple syrup in teas and cocktails. You won’t find this flavor just anywhere. . . yet.
Paulownia Lime Mocktail Recipe
Paulownia Lime Mocktail
4 Tablespoons fresh squeezed lime juice
5 Tablespoons Paulownia Syrup
4 Tablespoons water
Ice
Mix all ingredients and shake with ice. Pour over ice into glasses garnished with a lime. This makes two small glasses (pictured) or one 6.5 oz. drink.
Paulownia Jelly Recipe
2 cups Paulownia juice prepared ahead of time
1.75 oz. powdered pectin
2 cups of sugar
Just like for Paulownia Syrup, collect flowers and lightly wash the bugs off if you must. I gently pick through them instead of washing them to preserve the nectar and pollen for flavor. Put flowers, brown base and all, into a large bowl and cover with boiling water. Sink the flowers under a small plate put into the bowl to keep them under water. Let stand for 24 hours. The water will turn amber. The next day, strain the amber liquid through a jelly bag and measure to make sure you have 2 cups for this recipe. I usually make a huge bowl of them and divide the liquid for multiple recipes. They are so easy to collect and the extraction process is the same for simple syrup and jelly.
Pour the juice into a clean medium pot. Bring to a simmer. Add the pectin and stir until it is completely dissolved. Bring the mixture to a boil while stirring constantly. Stir in the sugar and bring the liquid to a full boil. Boil hard for 1 minute while stirring. Pour into your clean pre-prepared canning jars and top with prepared lids. This makes about 8 four oz. jars. Use standard hot water bath canning methods, boiling for 10 minutes. https://www.healthycanning.com/water-bath-canning-step-by-step
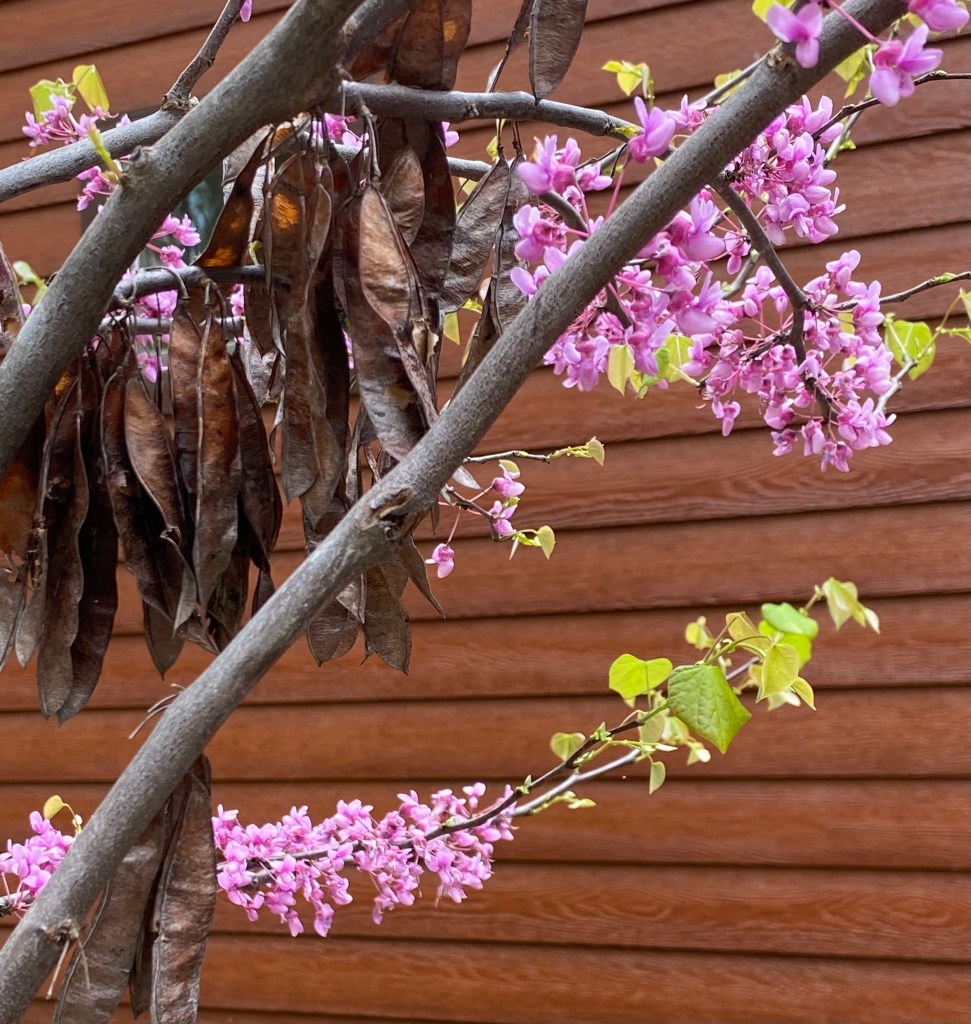
Redbud tree with last year’s pods and this year’s flowers
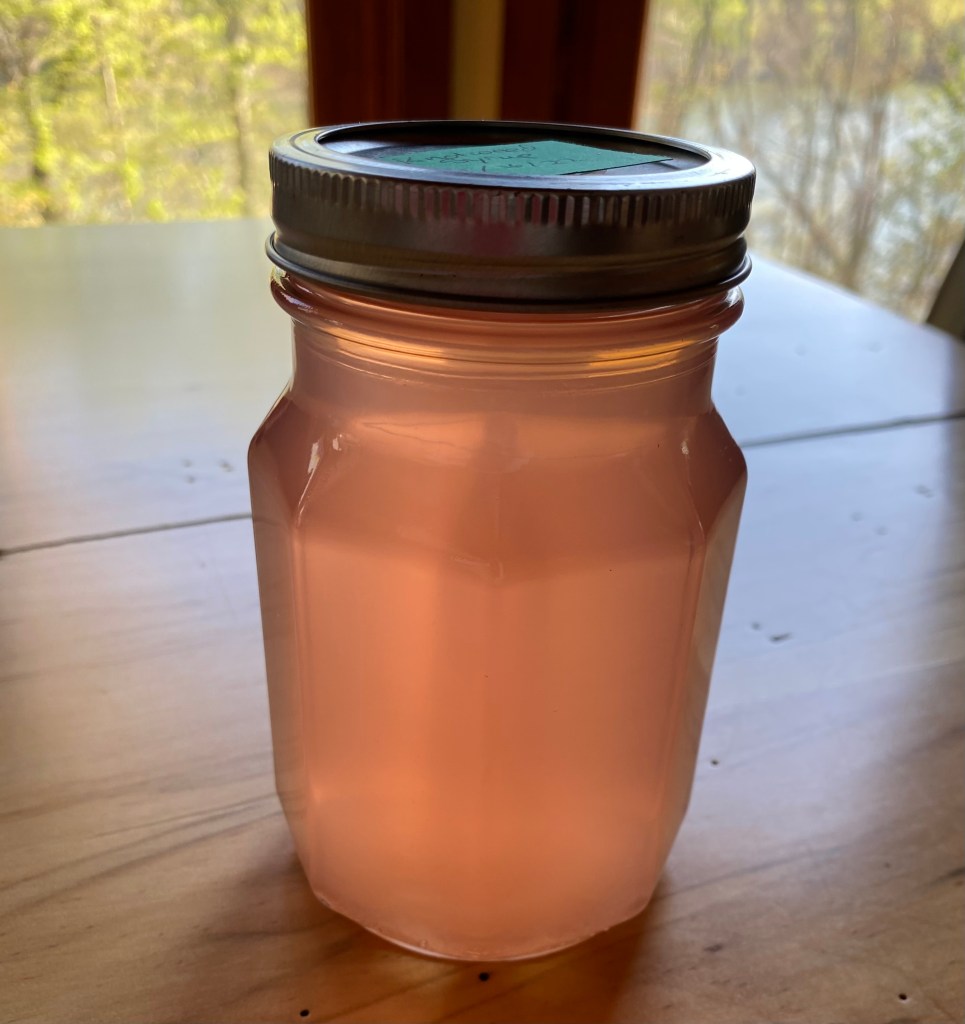
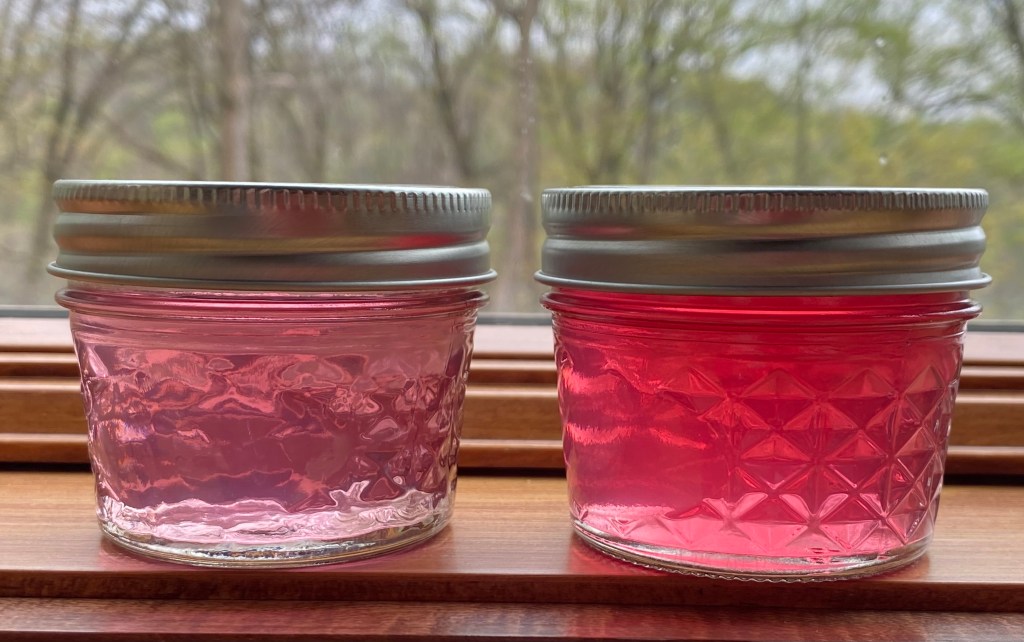
Redbud jelly is mild in flavor. It is easy to use in place of most any jelly any time. It is best known for it jewel clarity and pink to lavender color. The color varies depending on your water and the amount of lemon you use. I use this jelly in place of any standard jelly. It works well in recipes for thumbprint cookies, baked brie with apples or crackers as an appetizer, and other recipes calling for fruit jelly.
Redbud Jelly Recipe:
2 cups Redbud flowers and buds picked clean (washed only if needed)
1 1.75 oz. package of powdered pectin (regular, not sugar free)
2 cups white sugar (for clarity)
Lemon juice (I use very little so as not to alter the flavor (1teaspoon at most)
7 four oz. canning jars with lids or the equivalent (you will probably not use all of them, but just in case)
Collect 2 cups of Redbud flowers. Pick out the sticks and bugs to the best of your ability. A few left by mistake never hurt me. Wash the flowers briefly in cold water if they need it. Generally, I avoid washing the flowers because some of the sugars and flavor may be washed away. Place flowers in a heatproof bowl (a glass bowl lets you see the color). Pour 2 cups of boiling water over the flowers. Mix gently, cover to keep out the other stray creatures, and let sit overnight on the counter. After 24 hours, strain the mixture through a jelly cloth into a bowl. Measure the amount of liquid collected. Add two cups of the liquid to a non-reactive pot along with one package of powdered pectin. Stir to a rolling boil that cannot be stirred down. Add 2 cups of white sugar over the heat and stir until the sugar is completely dissolved. Here is where I add the lemon juice if I’m using it. Bring to a rolling boil stirring constantly. Boil for 1 minute. *Pour into scalded canning jars with boiling water prepared lids. Can, using the standard hot-water bath protocol for 10 minutes. I use 4 Oz. jars as shown in the picture above. These are fun to give as gifts and this recipe makes about 6 jars. If canned properly, these jars will keep on your shelf for a least a year. I have found that adding lemon juice strained through a jelly bag in the cooking step at the end will make the syrup pinker. But it also changes the flavor. So I don’t use much if any. I strain out the lemon pulp by using the jelly bag which preserves the jewel clarity of this beautiful jelly.
*Please follow standard hot water bath canning practices with jars and lids.
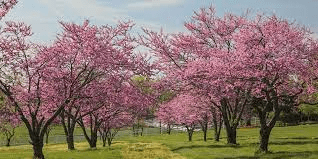
Redbud trees signal spring time in Appalachia. They are shades of pink or purple; not red. They are kin to peas. The fruits even look like pea pods. The pods are edible. However, the flowers are starring in these recipes. You can pick them easily by finding a redbud tree with branches low enough to reach. Run your hand down the branch gently collecting the flowers and buds into your fist. It is possible to collect a cup or two in minutes. You can make simple syrup or you can eat them fresh sprinkled on your salad or entrée.
Recipes
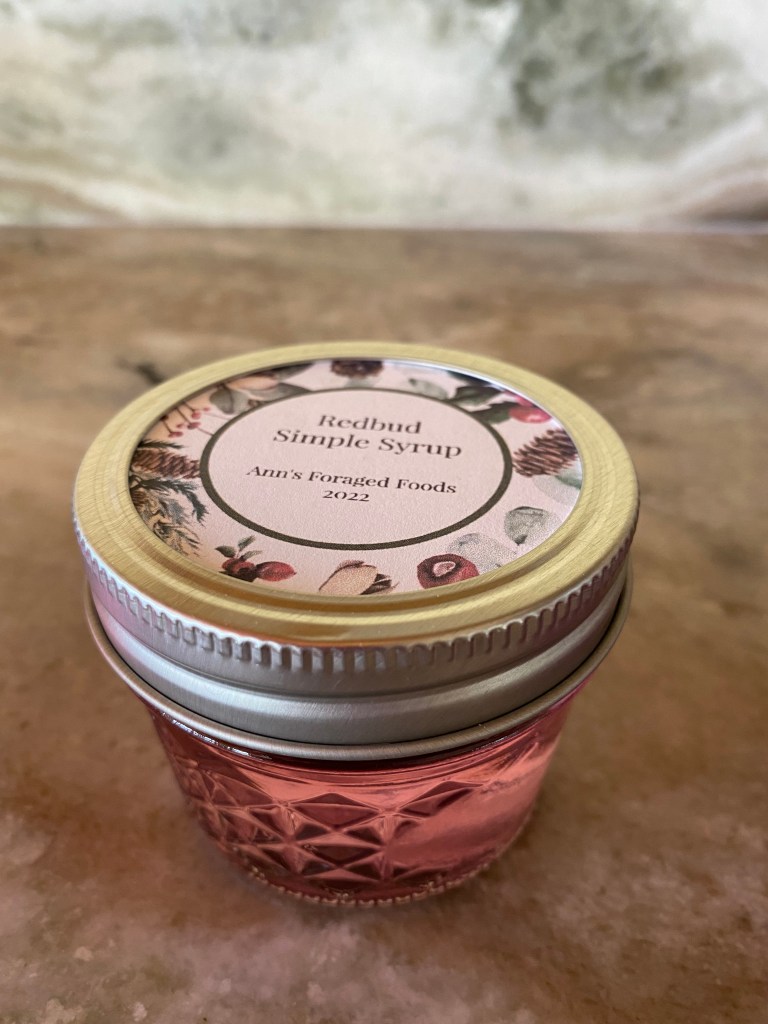
Redbud Simple Syrup: Collect 2 cups of Redbud flowers. Pick out the sticks and bugs to the best of your ability. A few left by mistake never hurt me. Wash the flowers briefly in cold water if they need it. Generally, I avoid washing the flowers because some of the sugars and flavor may be washed away. Place flowers in a heatproof glass bowl. Pour 2 cups of boiling water over the flowers. Mix gently, cover to keep out the other stray creatures, and let sit overnight on the counter. After 24 hours, strain the mixture through a jelly cloth into a glass bowl. Measure the amount of liquid collected. Add the liquid to a non-reactive pot along with an equal amount of white sugar. Bring to a gentle boil and stir until the sugar is dissolved. Pour into scalded canning jars with boiling water prepared lids. Can, using standard hot-water bath protocol for 10 minutes. I use 4 Oz. jars as shown in the picture above. These are fun to give as gifts and this recipe makes about 5 jars plus some to have in the fridge. If canned properly, these jars will keep on your shelf for a year. I have found that adding lemon juice in the cooking step at the end will make the syrup pinker. But it also changes the flavor. So I don’t.
Redbud seltzer: Mix 1 Tablespoon Redbud Simple Syrup or to taste with 1 Cup carbonated water (I use my soda stream to create this). Ice to taste. Stir carefully. It may bubble furiously. Serve.
Redbud Limeade: Mix 1 Tablespoon Redbud Simple Syrup with 1 Teaspoon fresh lime juice (lemon works too) into 1 Cup water. Ice to taste and serve. I like this with carbonated water too.
Redbud Margarita
2 Oz Tequila
1 full Oz lime juice with a bit extra
1.5 Oz Redbud Simple Syrup
Salt glass rim. Shake all ingredients over ice. Pour strained mixture over crushed ice in salted rimmed glass. Garnish with redbud blossoms, or lime wedges. Serve.
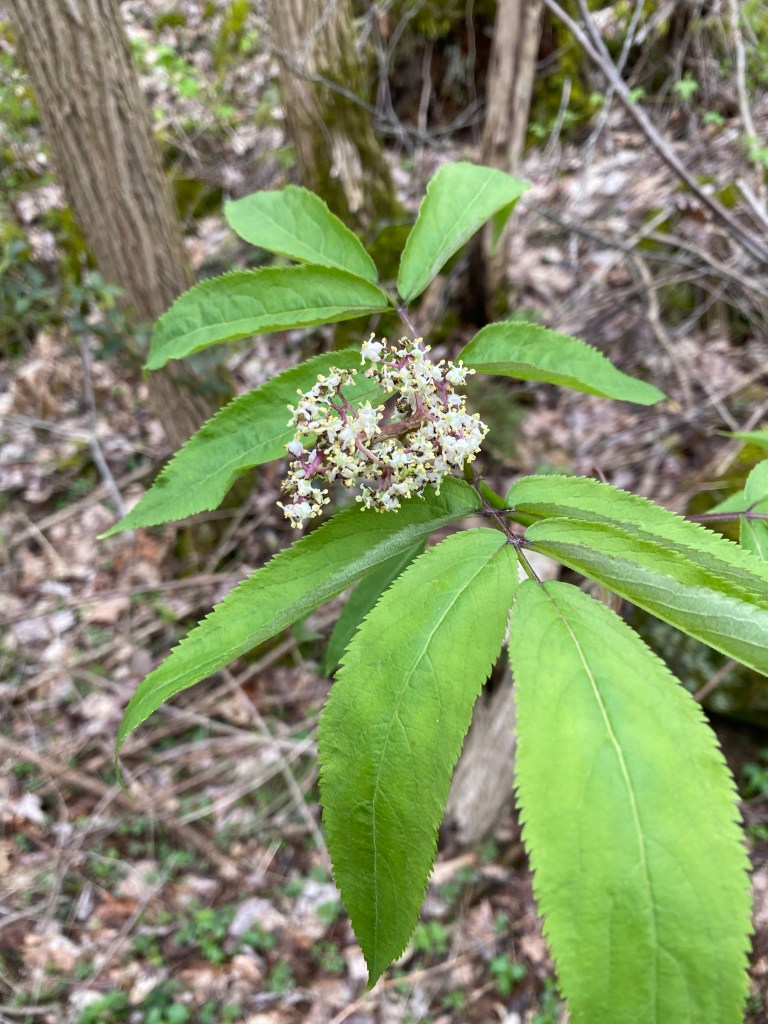
Elderberries are in bloom. I happened upon this Red Elderberry Sambucus racemosa ssp pubens at the right time. Note, the Common Elderberry S. canadensis is the one you hear most about. These Red Elderberry shrubs grow in rich woods often in an opening. Here in the mountains of Appalachia, Elderberry wine, Elderberry pancakes, Elderberry fritters, Elderberry jelly and medicinal extracts for colds, flu, and headaches are some of the ways human history is intertwined with this genus and it’s close relative- Common Elderberry. I have eaten Elderberry somethings for as long as I remember. Fritters are my favorite. And, I’ve heard this edible is high in Vitamin C. But we are not the only ones that highly value this food. So I didn’t pick all the blossoms, though I was very tempted.
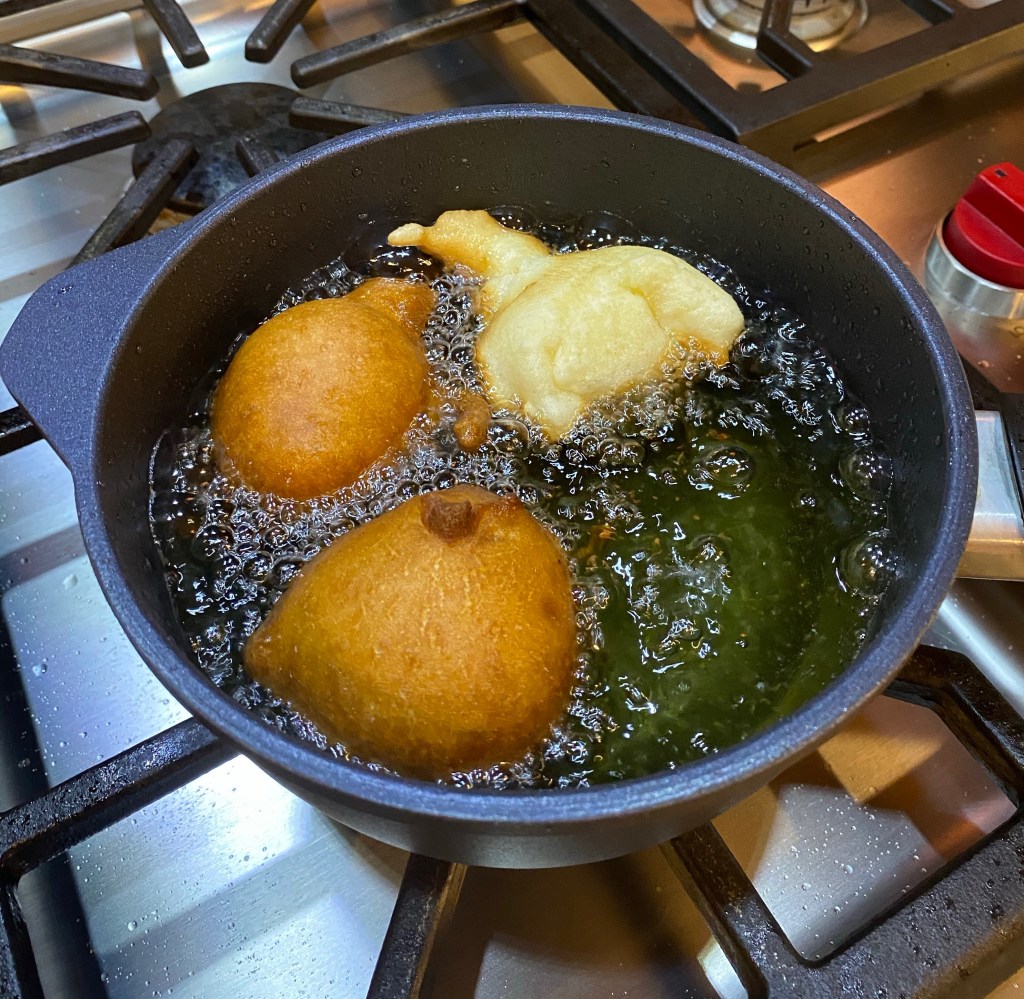
Deep Frying Fritters
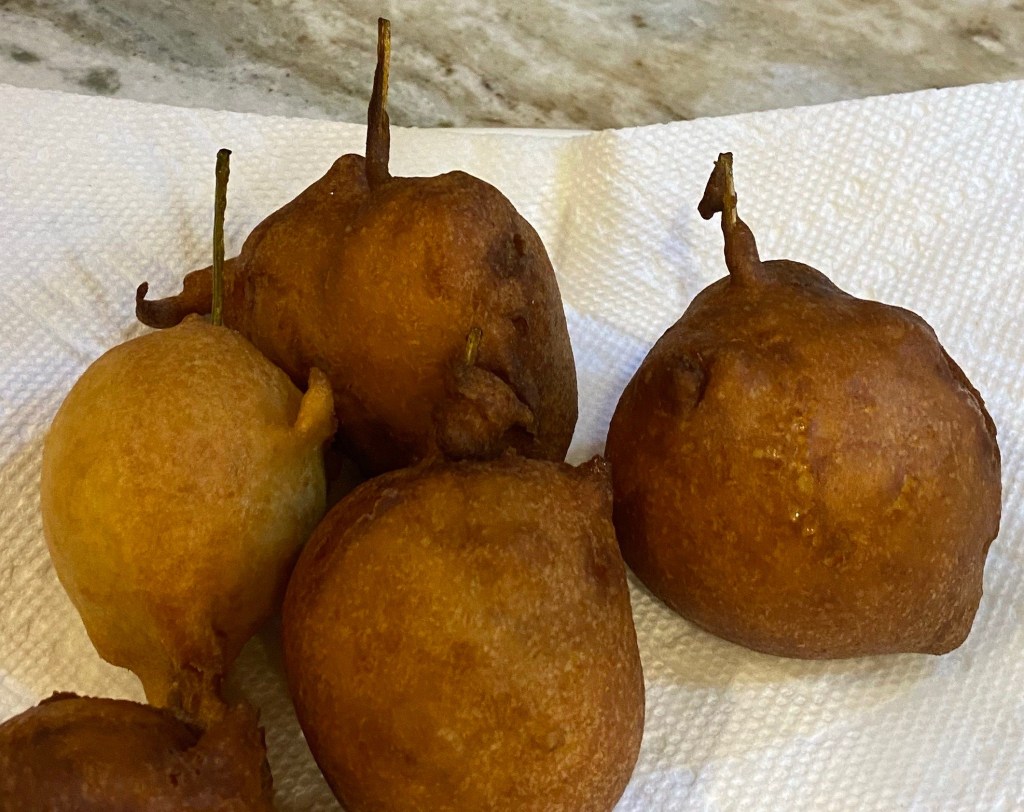
Finished Fritters Showing Stem Handles
Here is my recipe for fritters. Hope you like it as much as I do. This is a desert. OK, I confess, I used it for a side dish to a main course of soup, but these fritters are really closely related to a cake donut. Who doesn’t love donuts for dinner occasionally.
Ingredients
2 beaten eggs
1/2 cup yogurt mixed 50:50 with milk (mixture measures 1/2 cup)
1/4 cup club soda
2 tablespoons Elderflower cordial or what ever you have. I’ve had wonderful results with Cointreau
About 10 Elderflower blossoms (some cut the little clusters of flowers off the central stem, others shake them off. They are all trying to avoid eating too much of the green stem. The stem gives some folks digestive troubles. Not me though. I eat the fritters fully connected to the stem as you can see in the photo. I don’t eat the main stem beyond the flowers though.)
Pinch of salt
1/2 cup sugar
1 3/4 cup flour
1 1/4 teaspoon baking powder
Vegetable oil for frying
Pour at lease 1 1/2 inches of oil in the bottom of your pot. I used a small pot to not waste oil. You could use a deep frier but I don’t have one, nor know how to use one.
Heat the oil to 350 degrees F. I don’t have a thermometer so I turn the burner on low under my pot of oil and slowly heat the oil while I’m mixing the ingredients. When I’m ready, I test with a small flowerless fritter. When you drop in the batter, the oil should be hot enough to see the fritter dough bubble to the bottom of the oil, then quickly rise to float on the surface of the oil (less than 20 seconds (Jolene Jolene Jolene Jolene. . . COVID-19 reference). You want the oil to be hot enough to cook the fritter but not so hot the outer part gets too dark before the inner part is cooked. There is a delicate balance without a thermometer.
While the oil is heating, in a medium large bowl, beat the eggs, then add the yogurt, club soda (beer works too), and cordial.
In a small bowl, mix the salt, sugar, flour, and baking powder thoroughly.
Pour the dry ingredients into the larger bowl of wet ingredients and mix well.
One at a time, dip the flowers into the batter and cover them completely.
Drop the flower into the hot oil and fry until golden brown on both sides.
Drain on paper towels while you cook the rest.
You could dust them with powdered sugar if you chose. I just eat mine plain. Jim eats his with maple syrup or honey.
Tip: like unripe apples, the unripe berries might give you a belly ache. So pick these when they are in flower for fritters, or when the berries are purple or black for jellies and wine.
I love a hearty soup with fresh homemade biscuits and jam for dinner. A soup that is full of wild harvested, free greens makes me extra happy. Here’s my really tasty recipe that is tried and true; especially if you like a little heat. It tastes just as good two days later.
Common Chickweed
Common Chickweed Stellaria media is an extra easy green to gather. I mentioned it when talking about our native, Star Chickweed. Common Chickweed was brought to the US from Europe. It is considered a delicacy in parts of Europe. It grows in lawns and along roads and in disturbed areas. Right now, where I live, it is in prime eating condition. I do consider it a great, free spinach substitute. It’s supposed to be full of vitamins A, D, B complex, C and a whole lot of minerals too. I snip off the fresh, new ends of lushness until I have enough for my recipe. That way I hardly have to wash it when I get home. OK, truth be told, I often don’t wash the produce I pick when it is picked clean.
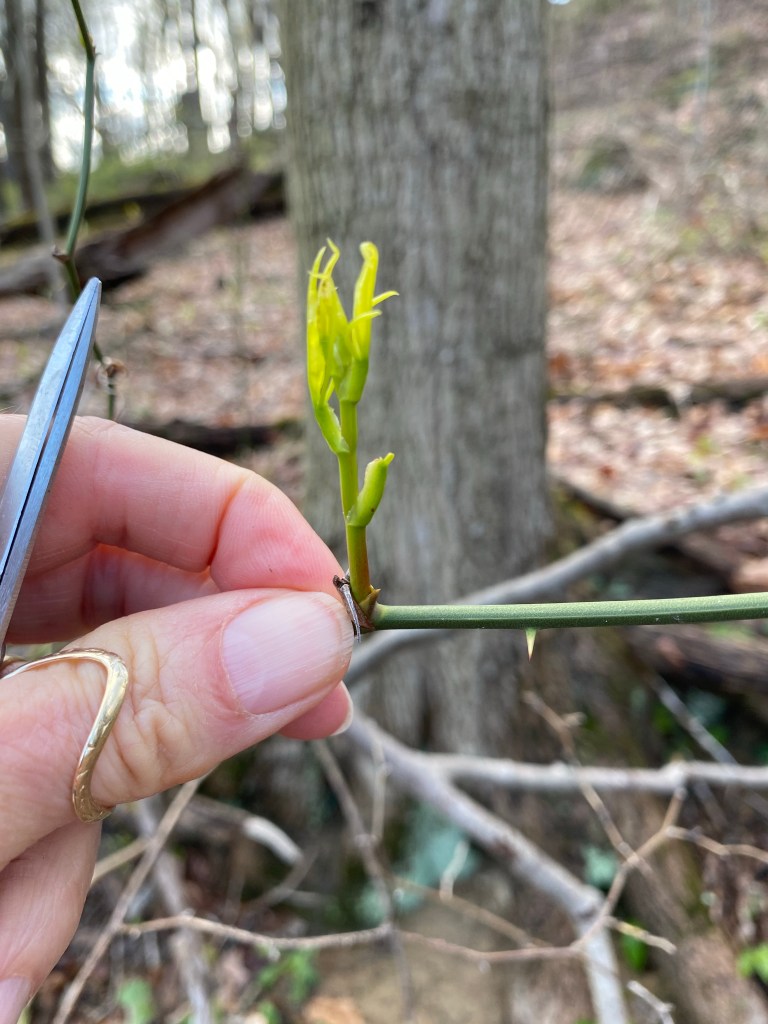
Greenbrier Shoot
I used to hate Greenbrier or Smilax. On a hot summer day, hiking in shorts, I’ve come home all scratched up from this tough, thorny, green vine with shiny leathery leaves. It grows in the Appalachian woods in tangles. It is often worse where deer browse the more easily eaten plants to extinction. Its thorns are brutal enough to stop a hungry deer almost no matter the season. Then, I discovered something, the spring shoots of new growth are really tasty, tender and easy to gather just by pinching them off at the junction with last years growth. I eat these straight or boil them for 3 minutes tops and season them with butter, salt and pepper. I also put them in recipes calling for kale, spinach, chard and the like. We have so many vines below my house I feel no remorse for picking them leafless and waiting for them to send out new shoots so I can do it again.
Washed Soup Ingredients
INGREDIENTS
1/3 cup store-bought Thai green curry paste (this is a key ingredient)
1 (13.5-ounce) can coconut milk
3 cups water
3 teaspoons of your favorite bullion
Sea salt and cracked black pepper to taste
1 pound broccoli florets, chopped
1 cup freshly picked Chickweed
1 cup freshly picked Greenbrier shoots
2 cups cilantro leaves
2 ramp leaves, finely chopped (you could use scallions or chives)
violets for garnish
Place the curry paste in a large soup pot over medium heat and cook, stirring, for 1 minute or until fragrant. Add the coconut milk, water, bullion, salt and pepper and bring to a boil.
Add the broccoli, cover and cook for 10 minutes or until the broccoli is tender.
Add the Chickweed, Greenbrier and half the cilantro and cook for another minute.
Pour into a blender (in batches if the blender is small) and blend the soup until smooth.
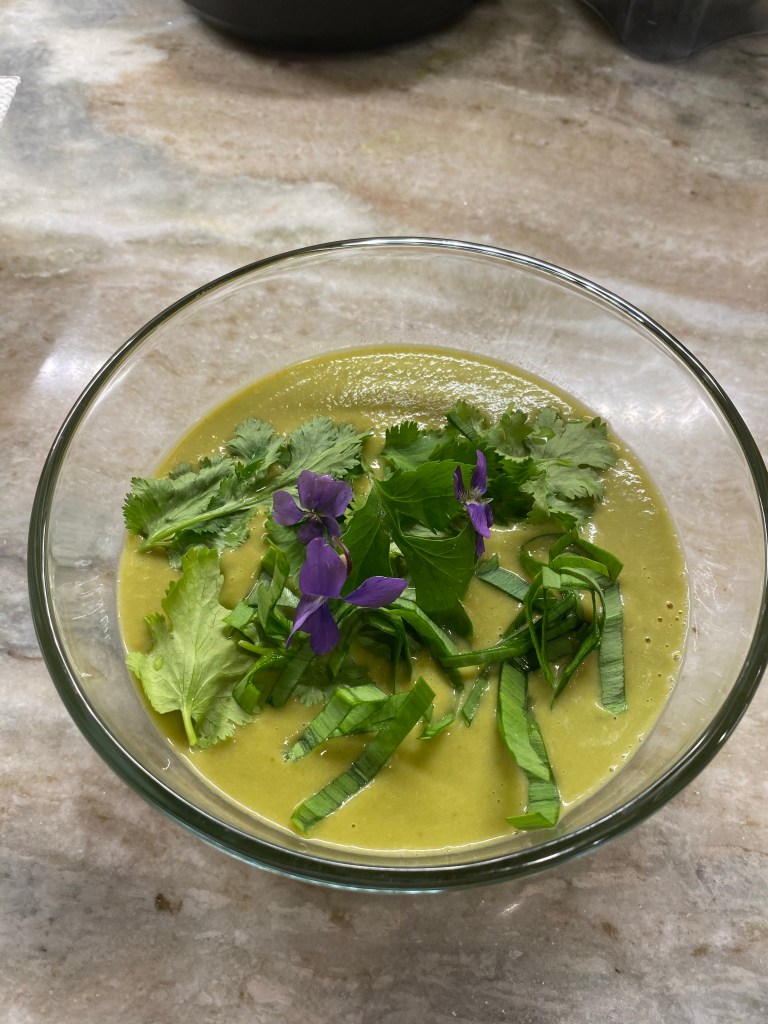
Divide among serving bowls and top with the extra cilantro, ramps and whatever else you wish to decorate with. I used violets in the photo.
This soup recipe is perfect for a quick dinner with biscuits and jam. You can spice it up by adding more Thai Green Curry Paste, or take it down a notch by adding less.
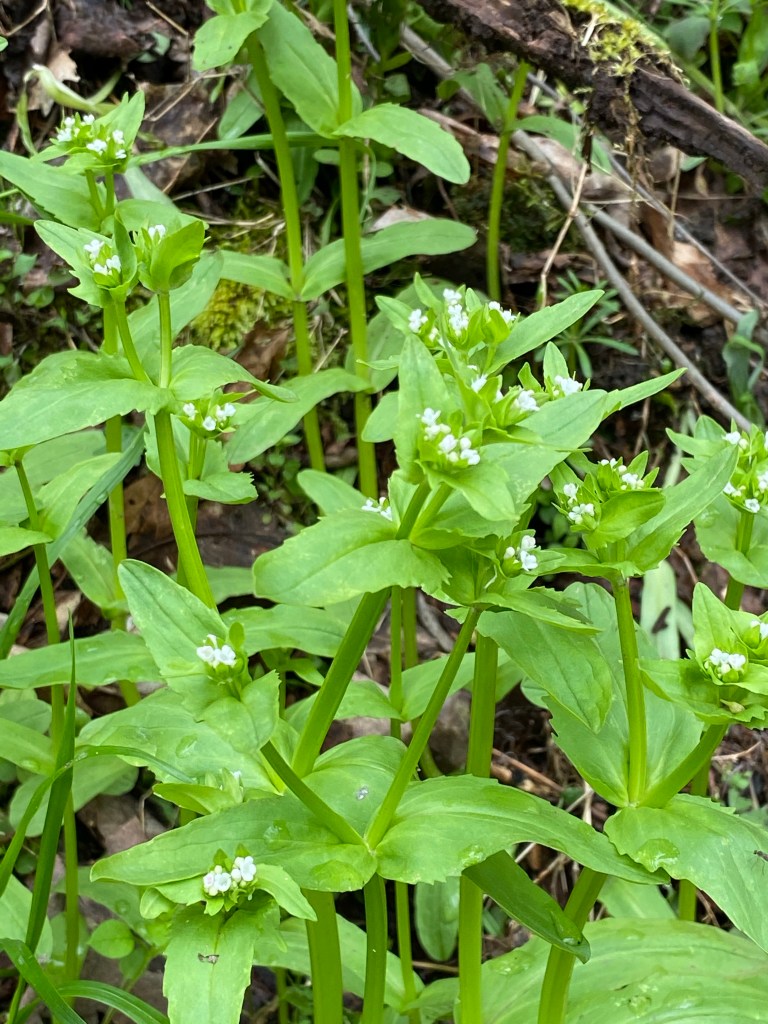
I mix and match spring greens with abandon. When the dandelion leaves get too bitter to eat, I move on to the less bitter species of edible greens. Dandelion leaves are too bitter now in my neck of the woods. They get too bitter as soon as they start flowering. If you need something quick, just move along to the greens that have less bit. That would include Bedstraw and Chickweed.
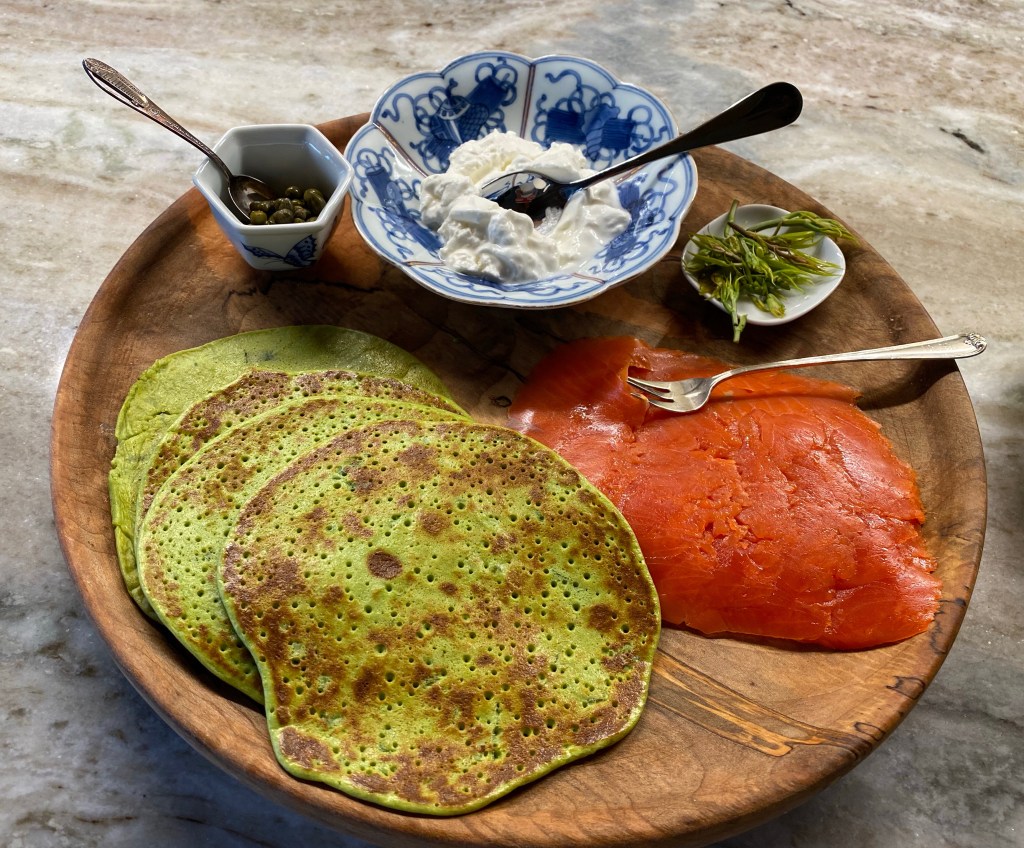
Bedstraw and Chickweed Pancakes with Smoked Salmon, Greenbrier Tendrils, Yogurt and Capers
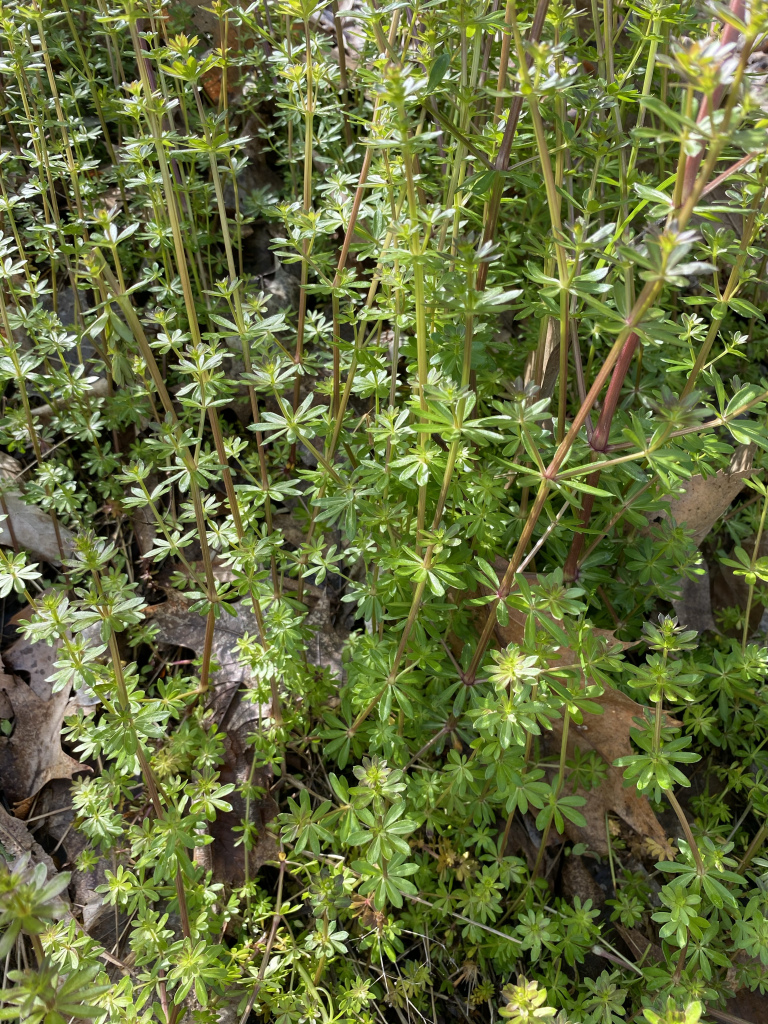
Bedstraw is coming up this time of year. It is found in moist shaded areas in my forests. I came upon this patch while running along a local rail-trail. This plant is odd. In early spring, it is tender enough to eat in salads. It has a smooth square stem with whorls of 6-8 leaves erupting from the same place along the stem. Quickly, as the season progresses, these tender stems turn tough but stay supple, sprawling across the ground. They also grow Velcro like hairs along the stems and leaves. This makes them fun to use to play tricks on friends. While hiking, I’ve been known to decorate an unsuspecting person’s back with streamers of them. But the best thing about Bedstraw this time of year is- it isn’t bitter and it is great to cook with instead of spinach. I collect only the top tender parts of the leaves and stems. I tell how far to cut down the stem by biting it. If it can be bitten without pulling hard, then I cut it there. I collect as much as I need for the recipe I have in mind. Like Dandelion greens, this plant has a short window of being tender and salad-worthy.
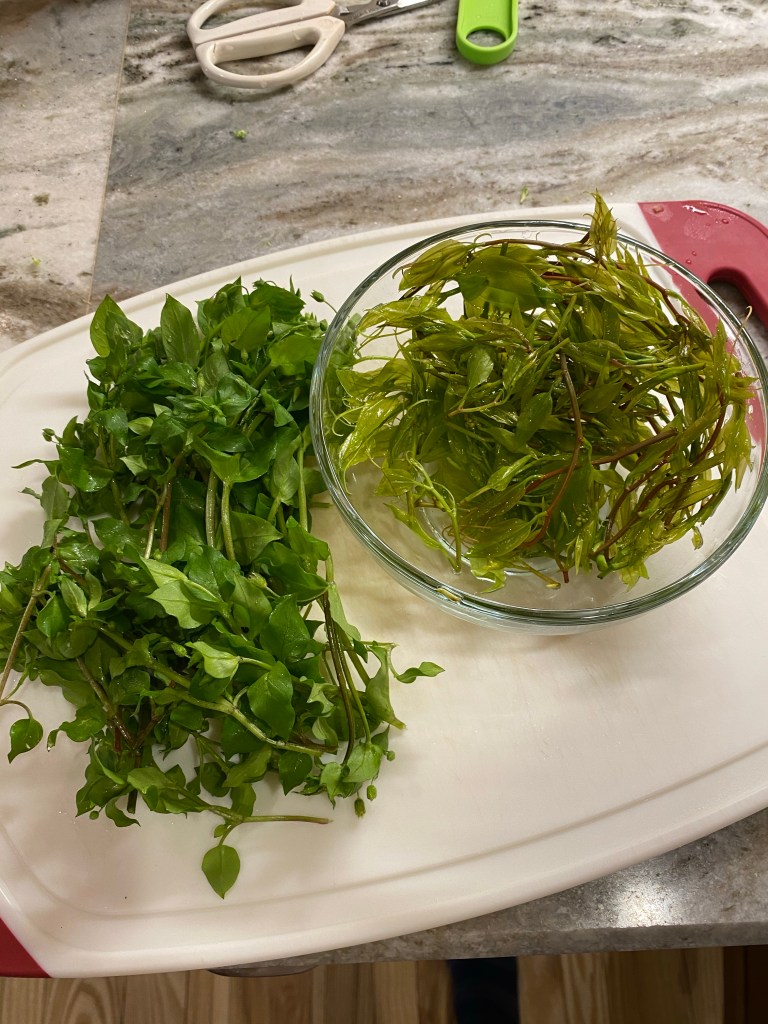
Bedstraw
Chickweed is in season now. I have eaten both Star Chickweed and Common Chickweed already this spring. This recipe I’m sharing is made with the Star Chickweed plants in this photo. I ate both the stem and leaves in the upper left and the flowering stalks and leaves in the lower right and am still here a week later to tell the tale. I find Chickweed a lovely spinach substitute. You can find Common Chickweed just about everywhere; it’s common. Star Chickweed is a classier plant found in partial shade, or dappled sunlight as some would say. I find mine along woodland trails in Appalachia. It’s easy to pick. I try to pick it clean to prevent work back in my kitchen so I take my small scissors and snip off the tender tops as clean as I can, shaking off any bugs or leaf litter as I go. It doesn’t take me long to get a serving if the site is plentiful. I don’t pick where there isn’t a ton because I want to make sure to sustainably harvest, not that I’ve run into anyone else foraging, ever, I know you are out there. I know Betty and Elaine are out there now looking for wild edibles.
Star Chickweed
Ingredients
1 cup (about a half an ounce, dry) Bedstraw
1 cup (about a half an ounce, dry) Chickweed
1 teaspoon kosher salt plus more
3 large eggs
1 cup yogurt
1/4 cup all-purpose flour
2 tablespoons vegetable oil plus more for skillet
4 ramp leaves (or scallions), thinly sliced, plus more for serving
1/4 cup (1/2 stick) salted butter, melted
Optional Toppings
Yogurt or sour cream
Smoked Salmon
Capers
Cook Bedstraw and Chickweed together in a small saucepan of boiling salted water until tender, about 3 minutes. Drain, squeezing out excess moisture.
Purée Bedstraw, Chickweed, eggs, yogurt, flour, 2 tablespoons oil, and 1 teaspoon salt in a blender until smooth. Transfer batter to a medium bowl and stir in thinly sliced ramps. (Batter should be thick, but runny enough for a 1/4 cup to spread to make 4 inch pancakes in the hot skillet ; stir in water by tablespoonfuls if too thick).
Heat a lightly oiled large nonstick skillet or griddle over medium heat. Working in batches, add batter to skillet by 1/4-cupfuls, spreading out to 3″-4″. Cook pancakes until bubbles form on top, about 2-3 minutes. Flip and cook until pancakes are browned on bottom and the centers are just cooked through, about 2 minutes longer.
Serve pancakes topped with your choice of toppings. I chose to spread yogurt first, then add a slab of smoked salmon, topped by a small group of capers and some Greenbrier tendrils I had just collected. Yum.
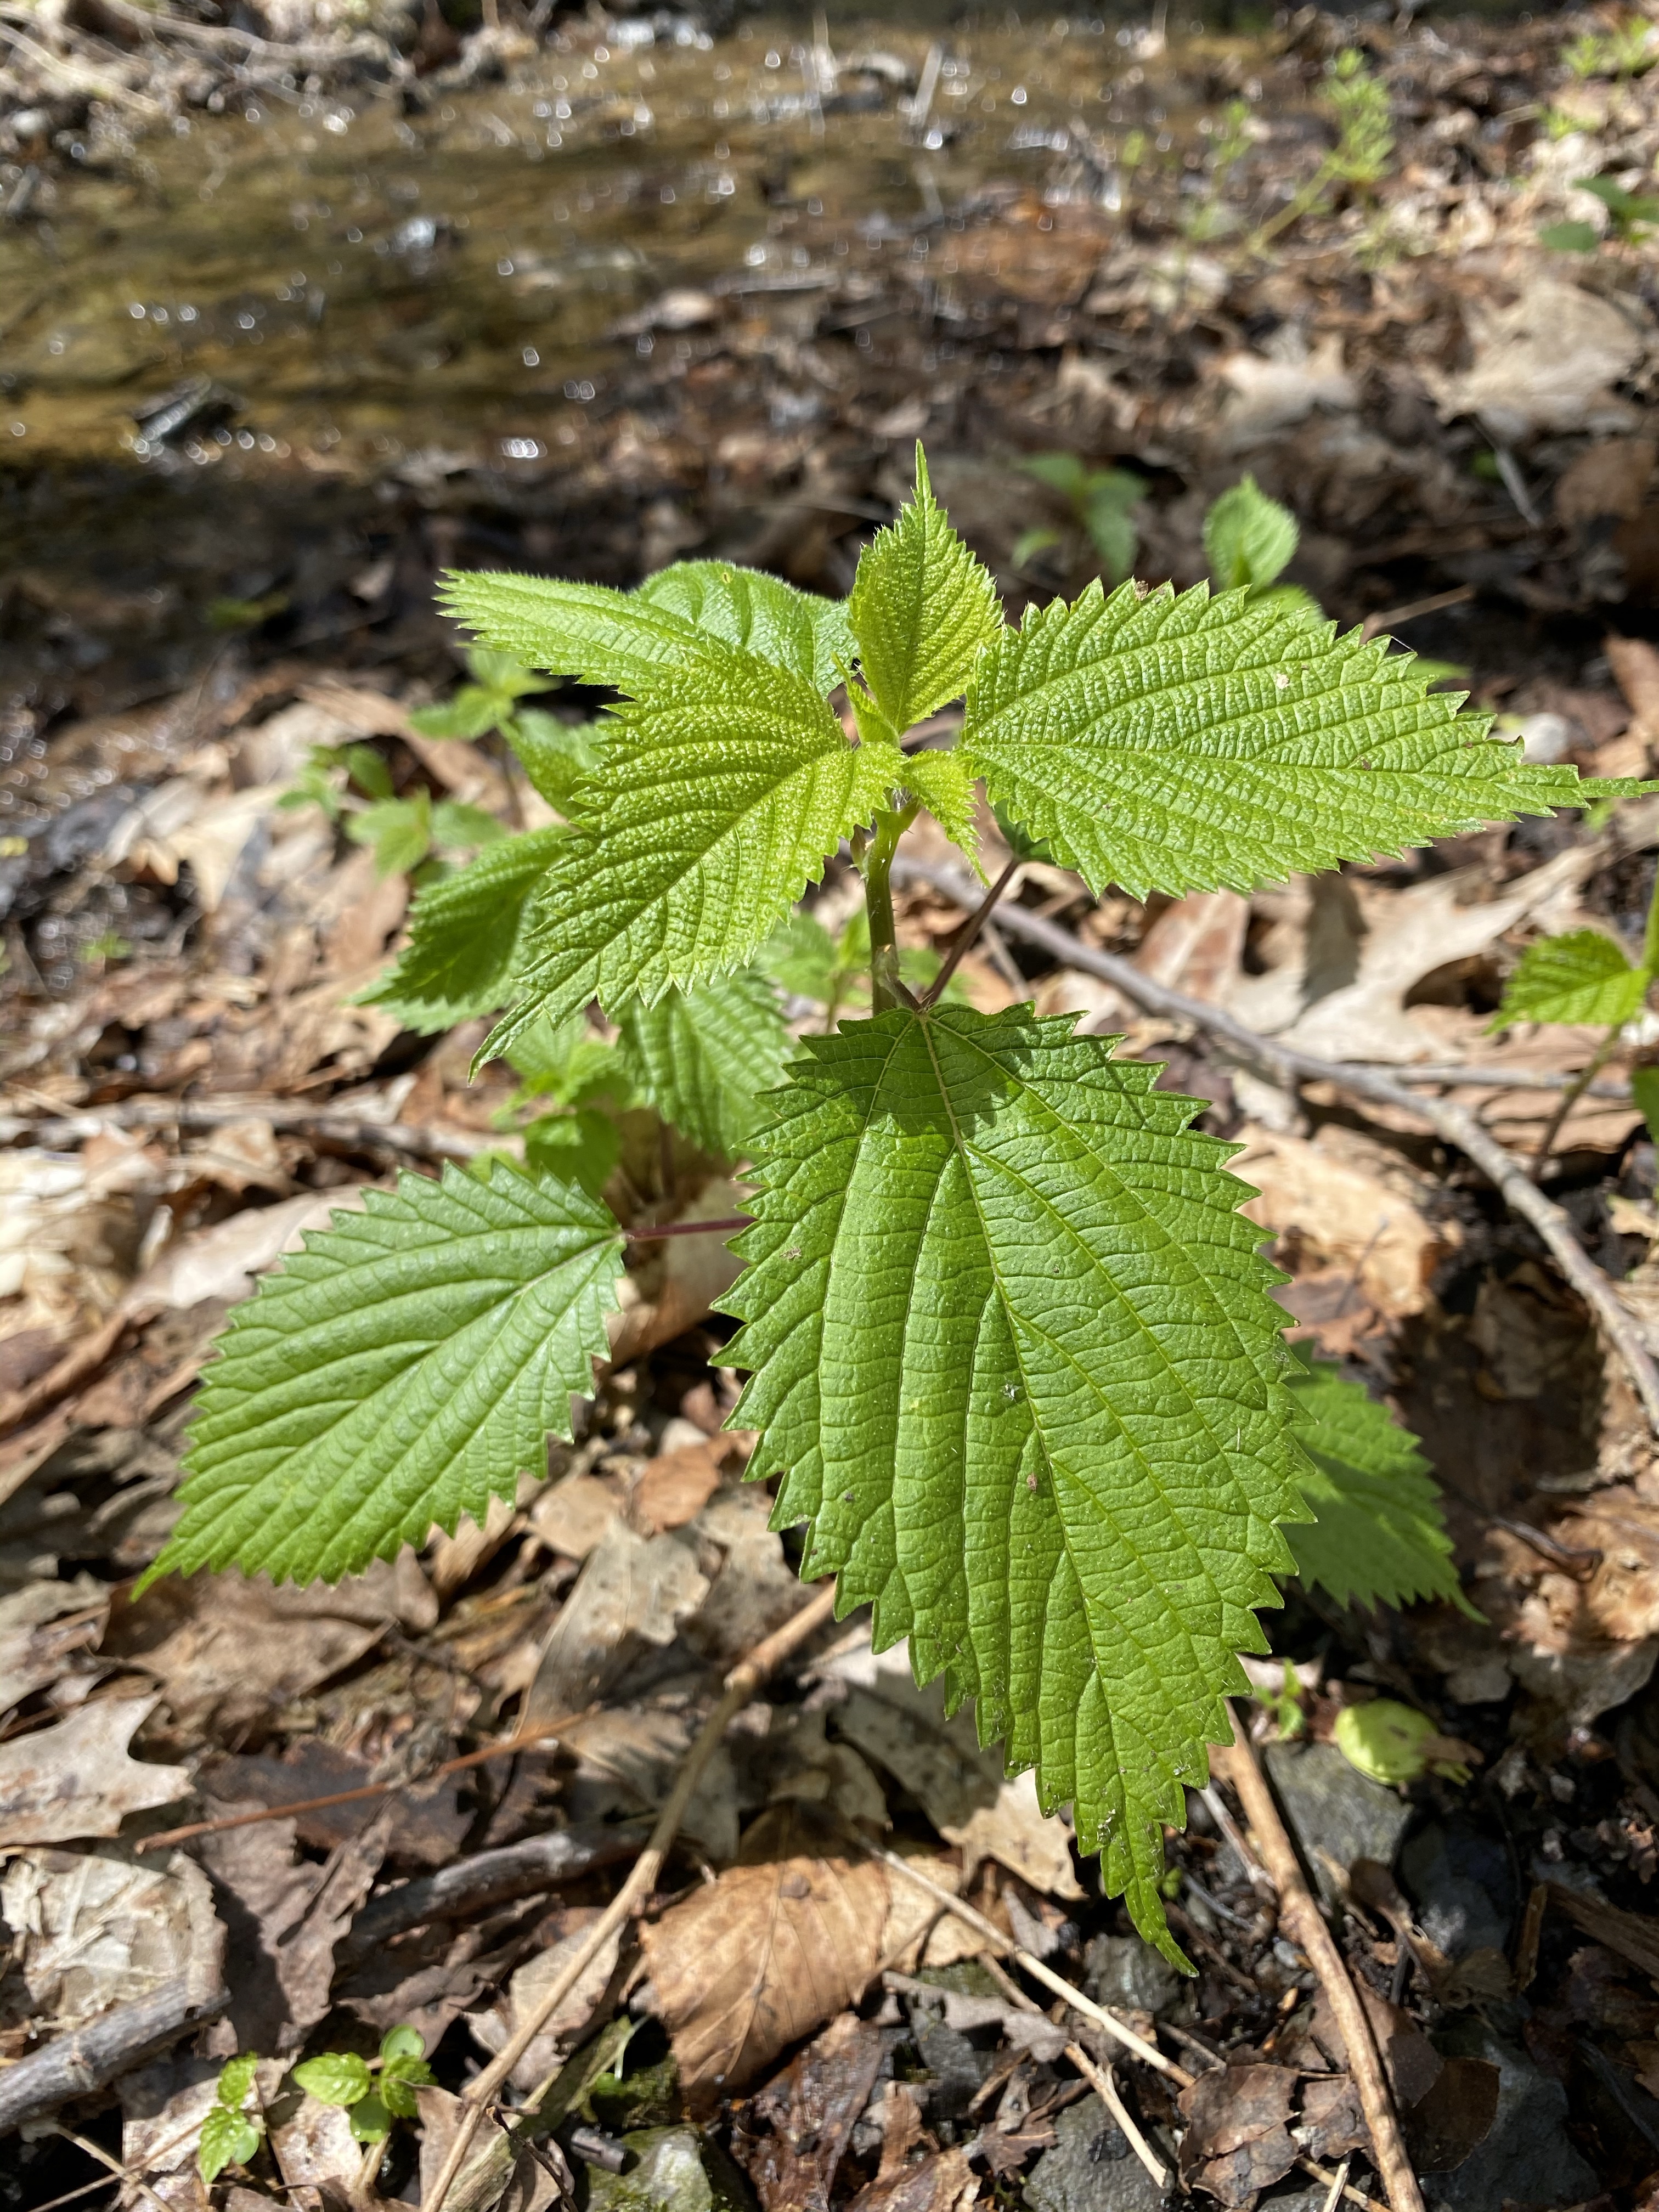
From Melarepa to me, we agree; stinging nettles are worth the trouble. They grow in damp woods and along trails just where I want to walk. Anyone who hikes West Virginia wilderness has run into this plant in the summer with bare legs and come out worse for wear. They have hollow hairs called trichomes full of histamine and other stinging stuff along the stem and the underside of the leaves. People talk about the anti-inflammatory uses for this plant, but the jury is still out on whether nettle extract offers more relief than a placebo.
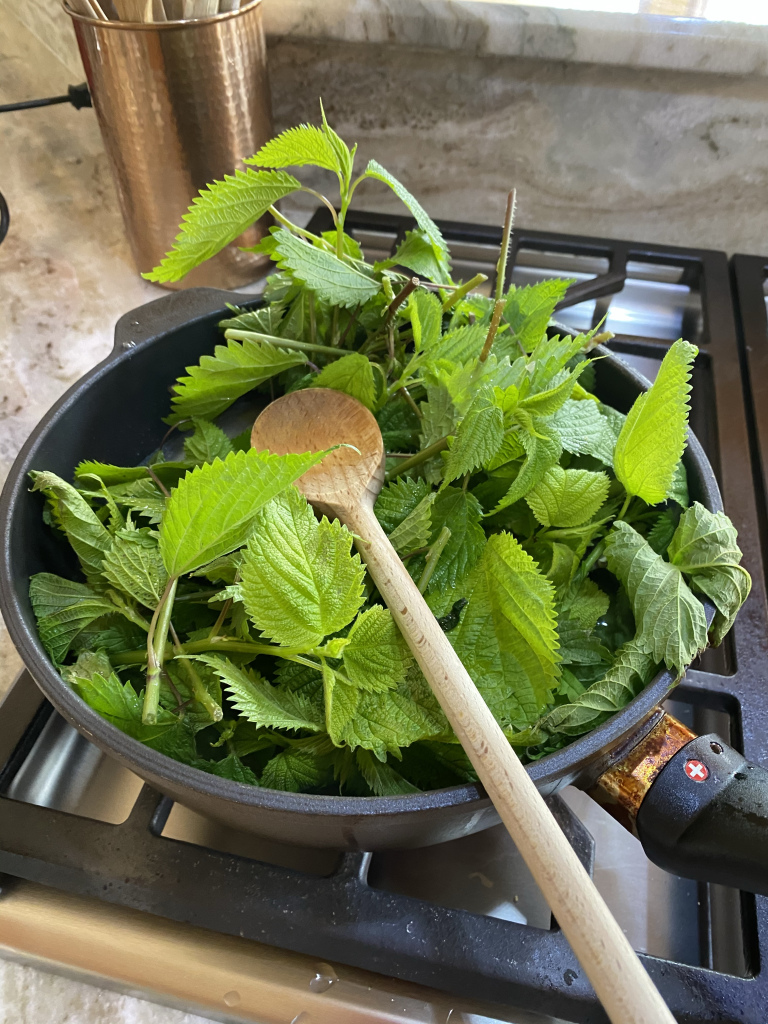
The upside is, you cannot poison yourself by picking the wrong plant. No mistaking stinging nettles for something else. If it doesn’t sting, it isn’t nettles. You can see what I’m talking about if you look closely at the stems sticking out of my pot in the photo.
Melarepa was an 11th Century Buddhist yogi whose skin turned green from eating ONLY nettles. They are good, but that’s a bit over the top. The way I harvest them in spring is with scissors. I just cut the fresh shoots off, stem and all and use the scissors to wrestle the plant into my collection bag. In the full summer, I only want the leaves. I found that I can pull them off or cut them off the plant with gloves by folding the leaf in half to keep the stingers away from my skin (the stingers poke through some gloves). I’ve even put a folded up leaf, with all the stingers tucked inside, straight into my mouth and chewed it up with no bad ending. Saliva breaks down the stinging proteins before they can get you if you hide the stingers in the center of your bite and you don’t suffer from dry mouth.
I’ve had a fascination with stinging nettles for about 50 years. The first time I collected them, back in the day, I put water in a pot on the stove and stuffed in the nettles and walked away with the burner on high. I had an angry Mom to face for that. That was the first pot I burned beyond use in my cooking career. Hey, I didn’t cook it to the point that it melted into the shape of a chocolate kiss on the burner like that tea kettle my sister ruined. But, I never did taste those nettles.
More recently, I’ve managed to cook them right. I made up this amazing soup recipe I’ll share with you that my foodie friends have told me I could sell. I’m not up for that, so you get the recipe for free.
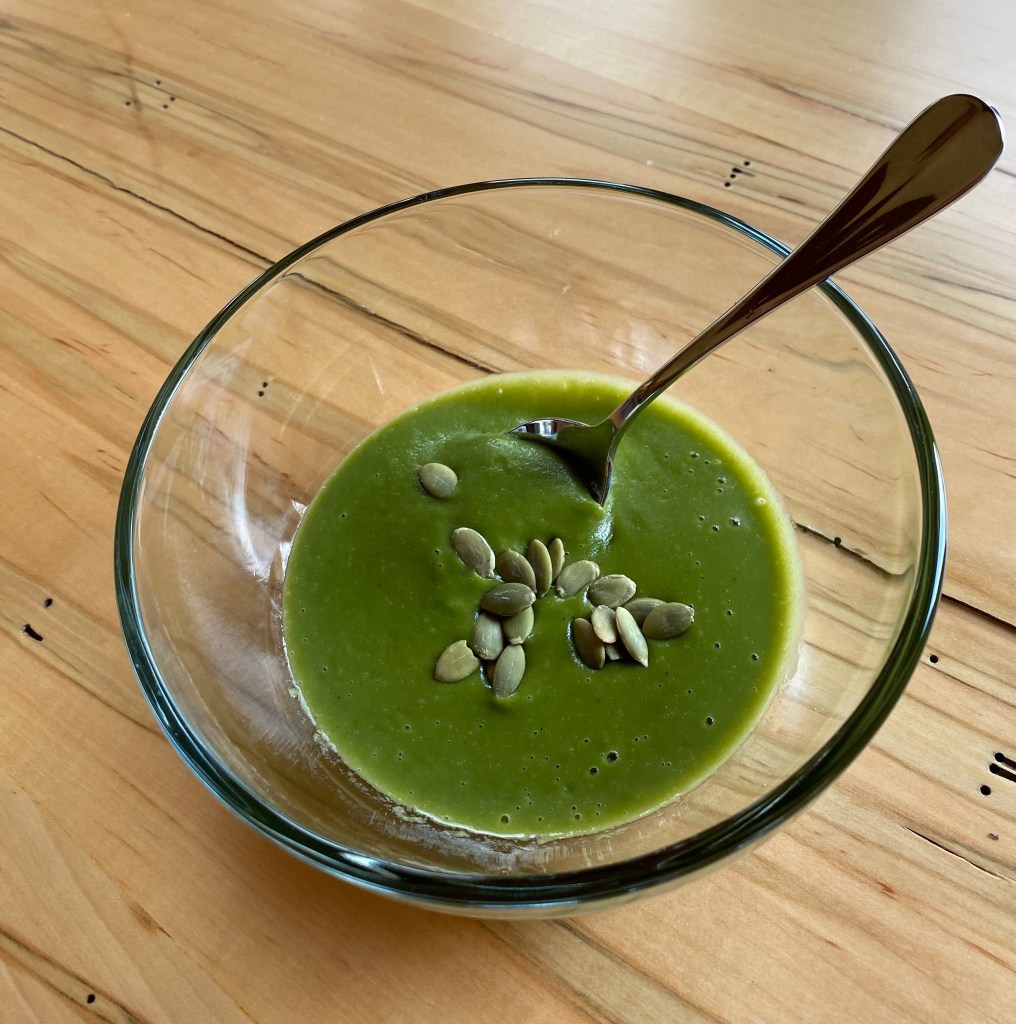
Nettle Soup With Ann’s 3STAR Michelin Rating
Nettle Soup Recipe
INGREDIENTS
1 cup chopped onions
Half ounce of whole ramps (2-3 ramps) chopped or one garlic clove, minced
3 tablespoons unsalted butter
3/4 teaspoon ground coriander
1/2 teaspoon salt
1/4 teaspoon black pepper
About 7 ounces (3/4 cup) peeled potato chopped into 1/2 inch cubes
3-4 ounces of nettles (weigh before washing – may be closer to 7 ounces after washing)
3 cups water
Pumpkin seeds for garnish (optional)
Wash nettles. I didn’t the last time. I picked them clean and it was fine. I don’t mind a little bug or two but I swear I didn’t see any. I wouldn’t worry about the exact weight of the nettles. I’ve used more than this and it’s still great.
Cook onion and ramp mixture (or garlic) in 2 tablespoons butter in a 4- to 5-quart heavy pot over moderately low heat, stirring, until softened, 3 to 5 minutes. Add coriander, salt, and pepper and cook, stirring, 1 minute. Stir in potato, nettles, bullion and water and bring to a boil, then reduce heat and simmer, covered, until potato is very tender (about 10 minutes).
Purée soup in a blender until smooth, then blend remaining tablespoon butter.
Taste. This needs no additional seasoning in my opinion. But, you be the judge because I’m not into lots of salt. Add salt or pepper to taste. *Note, if you didn’t use Better than Bullion, you will need to seriously adjust the salt.
I love to garnish this green soup with sour cream and an edible flower (violet, pansy, nasturtium). It works will with nuts as a garnish too (see photo).
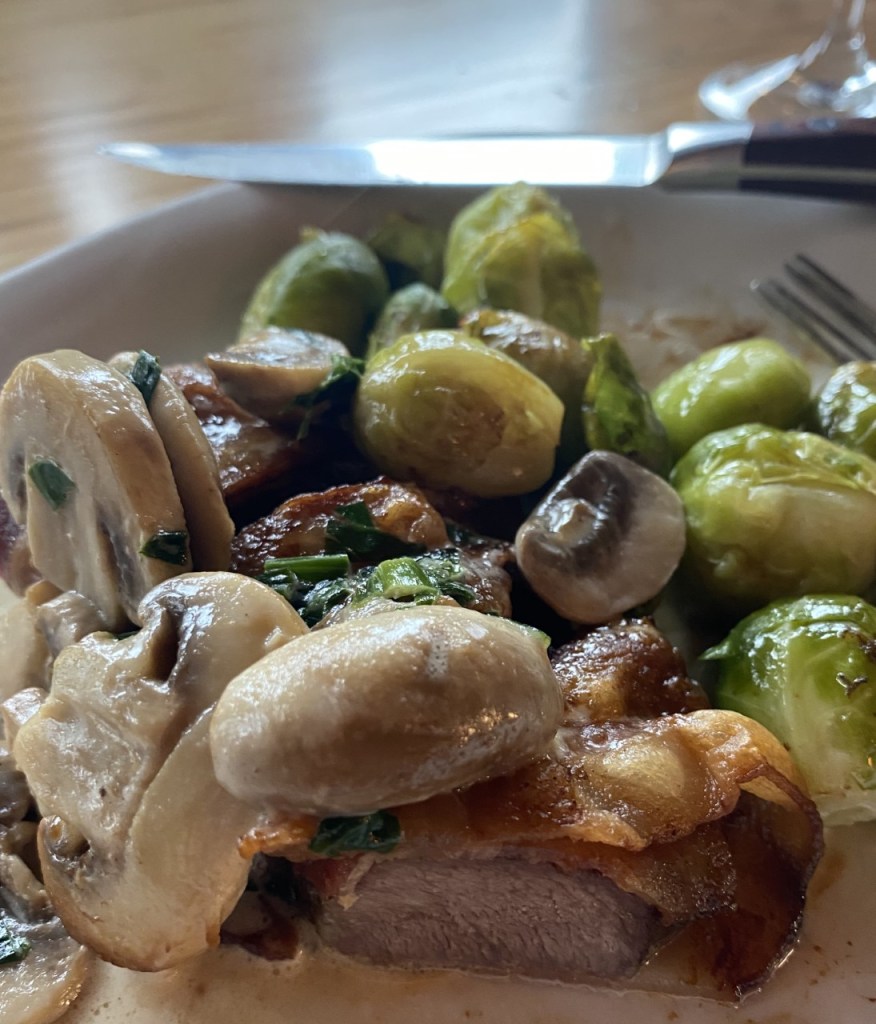
This post is dedicated to Linda Bise and my super cook, husband, Jim. Jim wins chef award again! Actually, I win too because I got to eat it. AND, my dear friend Linda wins buck hunter of the year for the past two years. She seems so delicate and refined yet she is the one I want to be stranded with during an apocolypse. She knows how to find dinner for the winter when it comes to venison. Not only can she outhunt most folk (no offense Tony and the rest of you guys), she field dresses her own deer by herself. She is super woman in my eyes. Her deer meat is always tender, beautifully cured and tasty. This center photo is Linda and her buck. Look at that meat in the photo to the left. It is so pure, tender and oh so tasty wrapped in bacon and slathered in ramp mushroom cream sauce. This is a bit of heaven.
Bacon-Wrapped Venison Tenderloin with Ramp Cream Sauce
Linda Bise and Her White Tailed Deer
Ramps
Ingredients
6 thick slices bacon
2 (3/4 pound) venison tenderloins
2 teaspoons olive oil, divided
kosher salt and ground black pepper to taste
2 tablespoons butter
1/2 pound sliced mushrooms (your choice). If you ever have enough morels, this would be the exception to use them in a recipe.
3 whole ramps white and green parts chopped separately (use greens and all white parts above the roots). You can substitute garlic and green onion for the ramps if you have to.
1/2 cup heavy whipping cream
Preheat oven to 375 degrees F (190 degrees C). Bake bacon in the preheated oven until partially cooked but still flexible, 6 to 8 minutes. Brush venison tenderloins with olive oil and season with salt, and black pepper. Place tenderloins side by side and wrap them in strips of partially cooked bacon. Place into a roasting pan. Roast until bacon is browned and an instant-read meat thermometer inserted into the thickest part of a tenderloin reads at least 145 degrees F, about 1 hour.
Heat butter in a saucepan over medium heat; stir mushrooms and white parts of ramps in hot butter until mushrooms are soft, 8 to 10 minutes. Stir green parts of ramps into mushroom mixture; add cream. Cook, stirring frequently, until sauce is heated through. Pour sauce over venison tenderloins. Serve and enjoy.