Betty Critch Discovers Violet Jelly

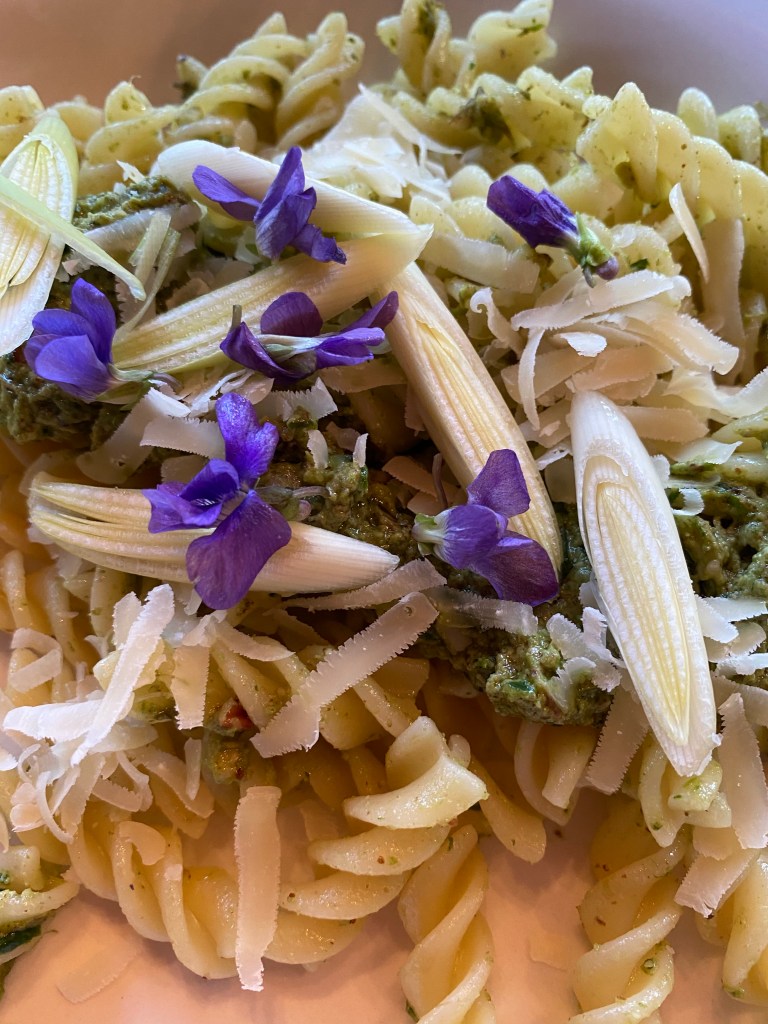
Betty and I have been friends for years, through thick and thin. She taught me the love of running; now I’m teaching her about wild edibles. She discovered violet jelly in the process.

Betty says, “I am grateful and delighted with the opportunity to become aware of all the natural gifts from God, that are around me. I realize they have always been here, some hidden in the grass and others I just simply didn’t notice. I have always believed that every challenge I faced, provided new directions and joy. I simply needed to learn from the challenge and become open to the world around me.

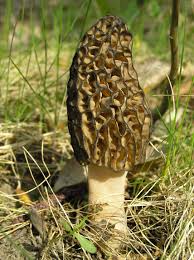
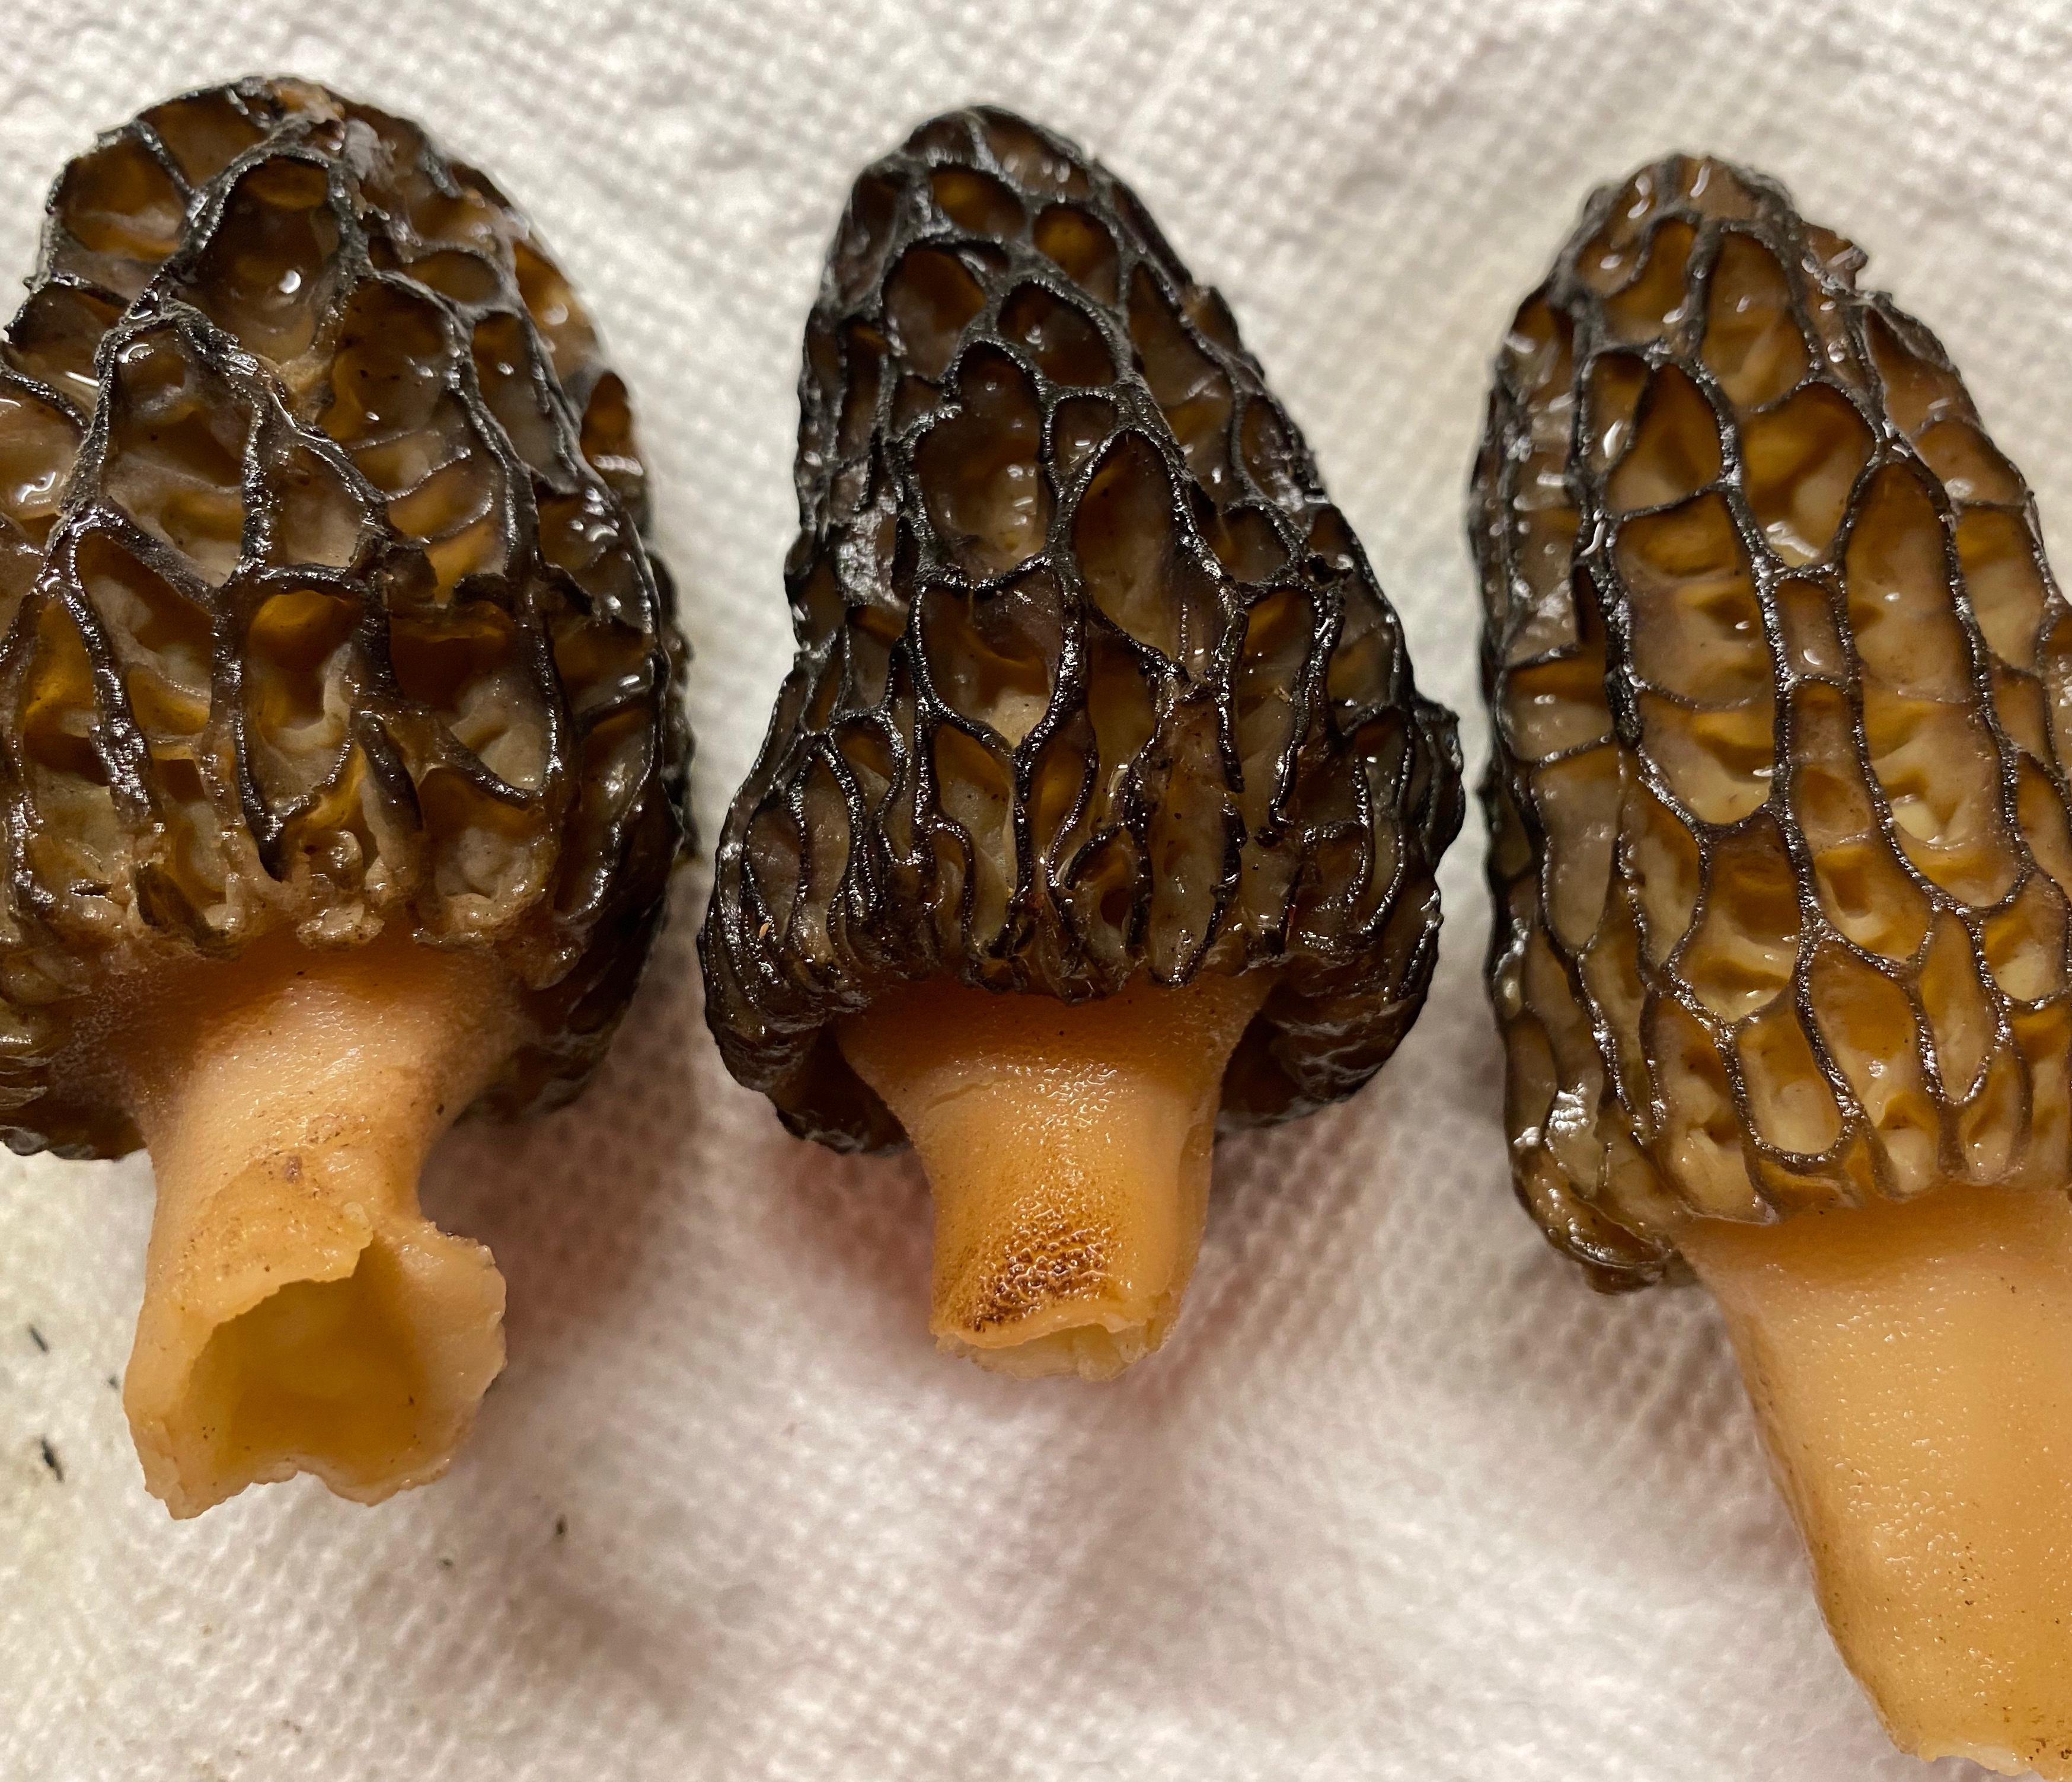
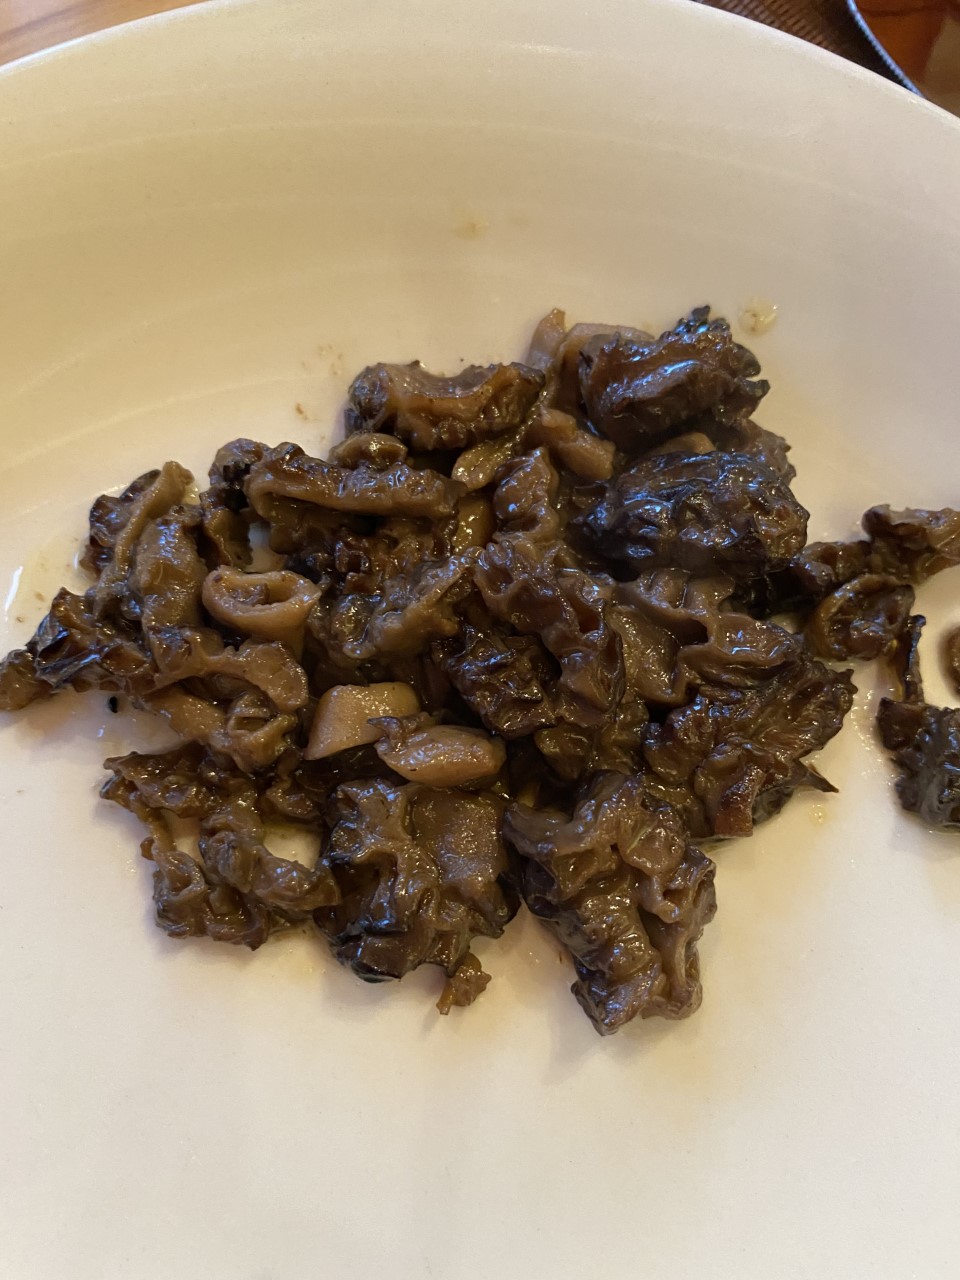
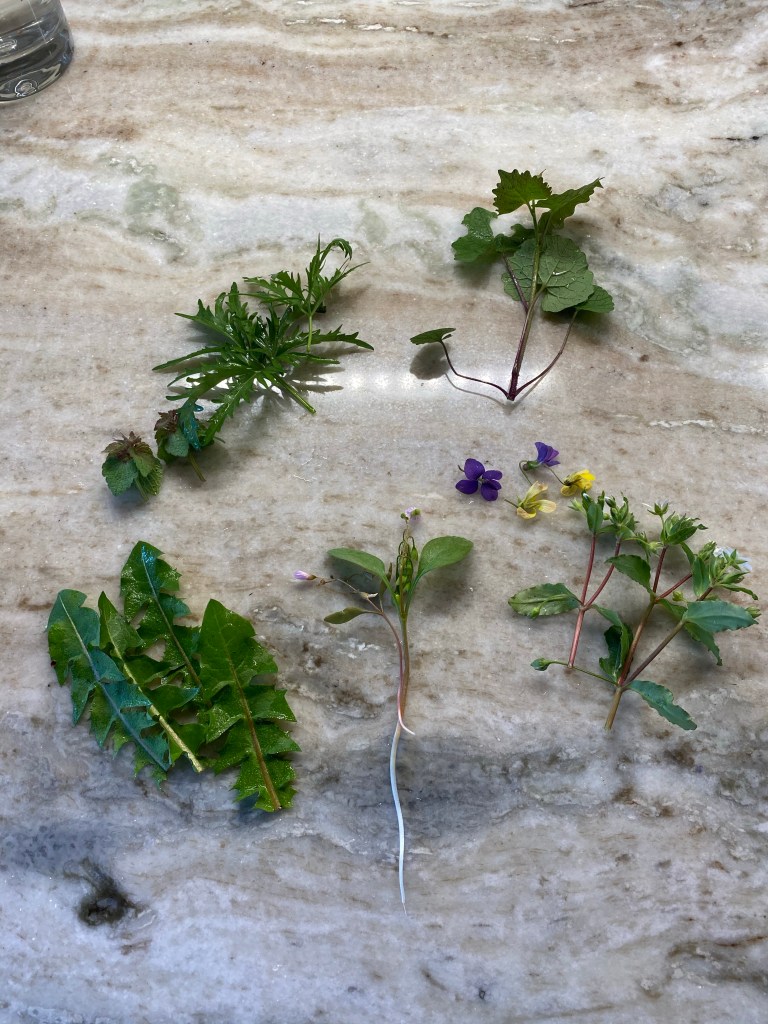
To that end, I have taken to walking every morning with my friend Elaine Bowen. We started at the Botanical Gardens and graduated to the Decker’s Creek Trail. Every morning Decker’s Trail offers a new gift of life. Again, always been there, I just was not noticing. Then we started texting Ann Chester with pictures of wildlife for her to identify. Then my colleagues from Juice Plus started sharing and posting “Virtual Health events” To that end, Ham Brower and Lupo Passer hosted a plant medicine walk. Now I am hooked and text Ann every morning, with questions like, ‘what is it, can I it eat it etc.

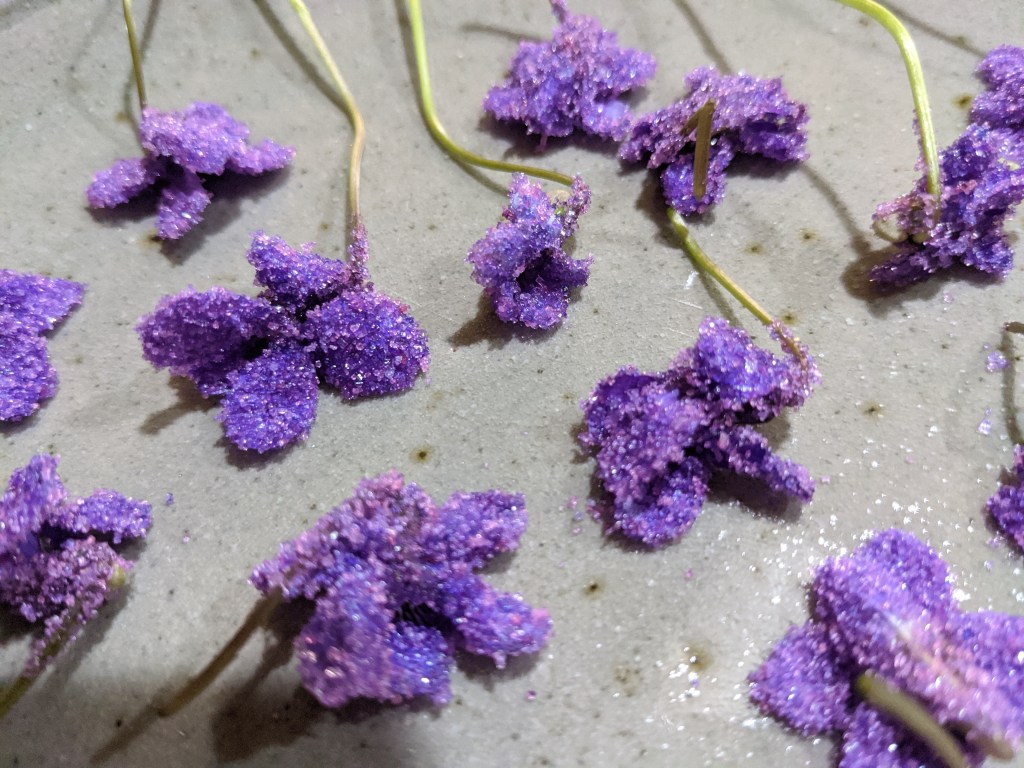
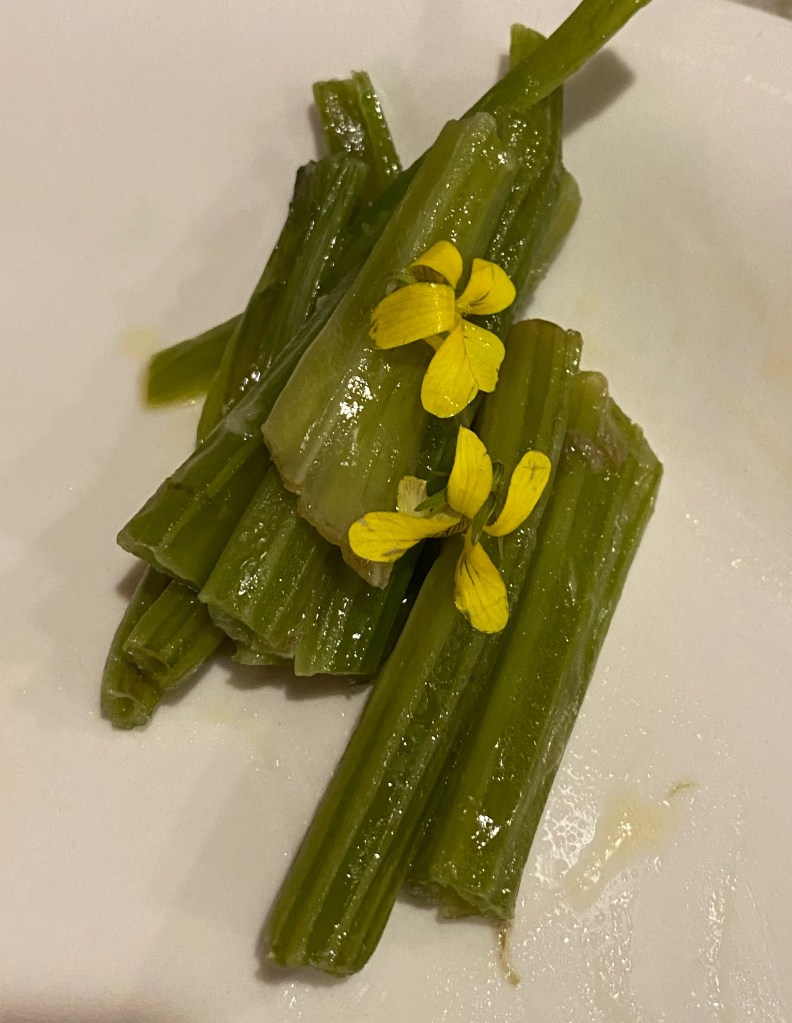
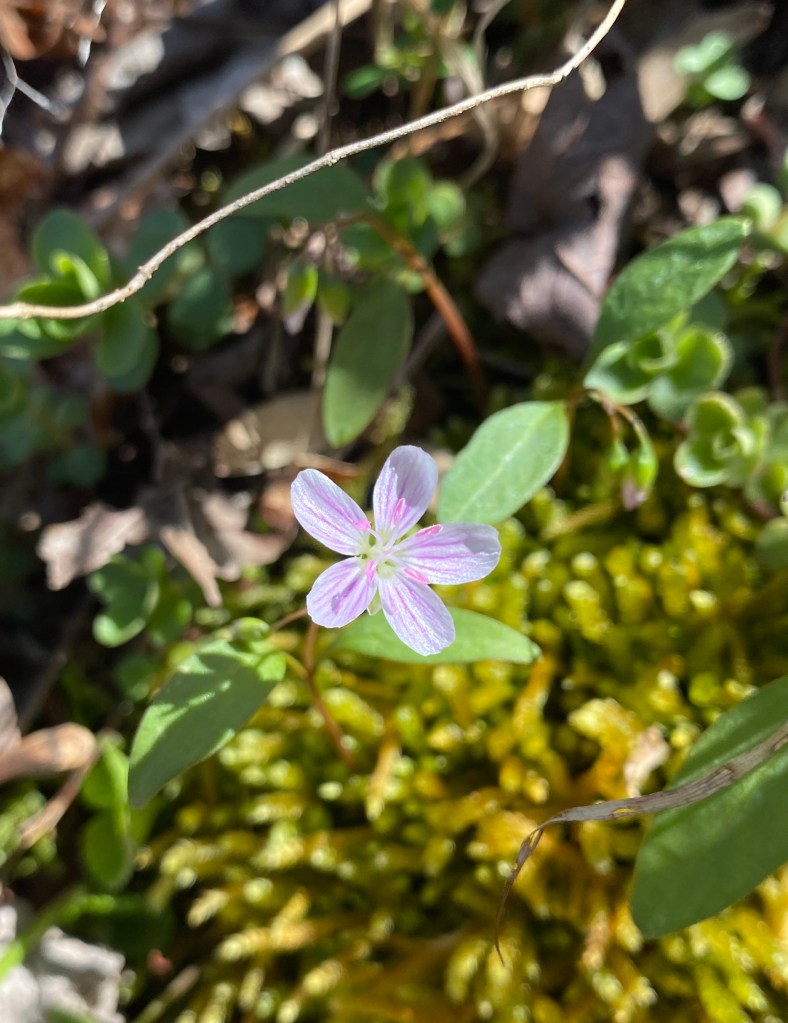
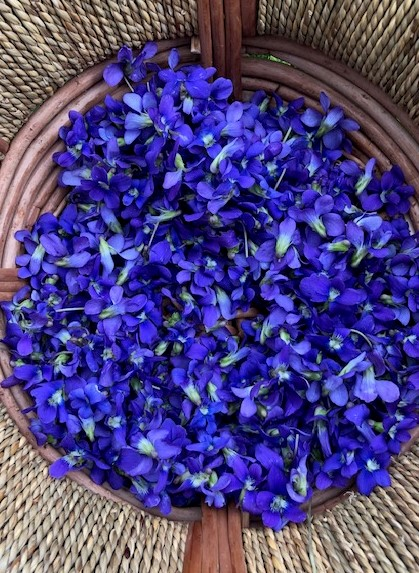
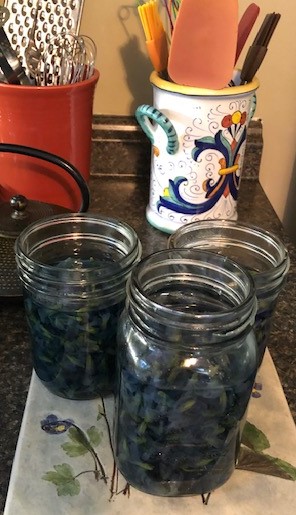
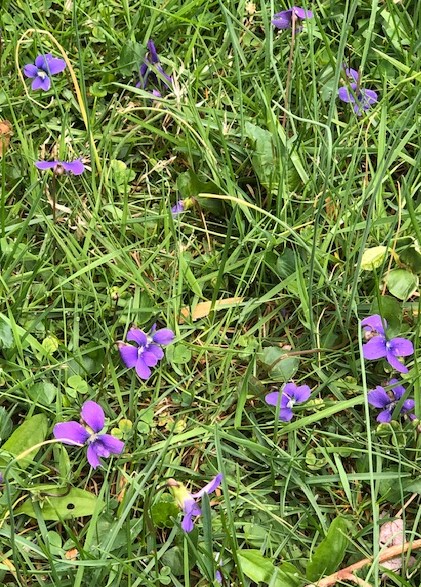
Ann texted me a picture of a violet, and said have you seen these? No, I replied. Then low and behold, they were all over my yard. A friend, that I shared my discovery of violets with, provided me with a recipe for violet jam. For the first time in my life I made jam. This violet jam is amazing. It is beautiful, light and delightful. The process of discovery to harvesting the flowers was a moment of meditative joy. I have provided the pictures and the recipe.

This blog Ann has created is providing me with so much “food for thought.” In this time of such uncertainty, Ann, Elaine and the great outdoors are feeding my soul with so much nutrition, I know that I am becoming a better version of myself.”

Violet Jelly Recipe

Ingredients:

  • 1 pint violet flowers
  • 2 Tablespoons lemon juice
  • 3 ounces liquid pectin
  • 4 cups sugar

Fill a pint mason jar full of violet flowers. Pour boiling water onto the flowers, gently pressing them to release any air bubbles. Cover the jar and keep out of the sun for 24 hours until the water turns sapphire blue. Strain liquid off the violets through a colander lined with a coffee filter or paper towel. Bring the liquid to 2 cups by adding water. Add the lemon juice (changes color to purple) and bring to a boil. Boil 1 minute. Add sugar and pectin and bring back to a rolling boil. Boil 1 minute more. Remove from heat and skim any foam off the top. Boil jars and lids for 5 minutes. Fill jars with jam mixture, attach lids and place in boiling water for 2 minutes. Cool and place in refrigerator. 

The Morel is the Story

Morchella - Wikipedia
True Morel

Why mess with perfection. This is gourmet! A treasure of Appalachian Cuisine is the Morel Mushroom. Fresh picked, these bring nice money in big city markets. But I get them free just for having the good sense to live where they grow. You might notice a lack of instructions on where to find them. Nobody in their right mind ever tells someone else their secret hunting spots unless they are star struck in love and have run out of flirting skills.

You can find many recipes for morels. However, I would never bury these delicacies in any other food. I want my morels sautéed in butter with a touch of salt (photo on right). Anything else is a second rate. It’s like watering down your favorite beer or wine. Why would you do that? Why mess with perfection?

Morels are one of the few mushrooms that are so distinct that I feel comfortable picking them. A couple of poisonous mushrooms look sorta like them, but not really. The true Morel that tastes unbelievable has this look (see photo) where the top portion attaches straight to the hollow stem and the top is hollow too. Just because I told you this secret doesn’t protect you from poisoning yourself though. So don’t pick mushrooms! Especially the ones I want to pick but you got there first!

If you happen upon some, and didn’t follow my instructions above, here is my recipe.

Ingredients

  • 1/2 pound morel mushrooms
  • 2 Tablespoons of butter
  • 1/4 teaspoon of sea salt

Morels are bug and dirt collectors so you might want to wash them. I usually do, but not always if I can pick them clean. To wash them, I run them under the spigot one at at time, rolling them under the water to release anything I’d rather not eat. Then I dry them well with paper towels.

Next, cut them up into bite sized pieces. They make nice hollow rings if cut cross-wise. Then heat a large cast-iron skillet or any pan will do. Add butter and melt. Then add the Morels. Don’t over load the pan with too many; make sure they fit in a single layer in the bottom of the pan. You might need to do batches if your pan is small.

Saute on medium, stirring until the Morels release their liquid, about 5 minutes. Continue cooking, adjusting the heat to maintain a light sizzle of the mushrooms until the liquid has evaporated (about 10 minutes). Be sure to keep the heat low enough not to burn them!

Transfer the Morels to a plate or serving platter and sprinkle with sea salt to taste. Serve immediately and enjoy!

Jenny’s Crystalized Violets

Jenny Bardwell is a long time friend who I’ve admired for her cooking talents for decades. She is the international czar of salt rising bread and a fabulous science teacher, international traveler and kind of a renaissance woman. She shared this violet recipe with me that is a cheap classy decoration for anything you want to fancy up a bit.

This image has an empty alt attribute; its file name is violets.jpg

Jenny says: Here (see photo) are some violets that I have crystallized. I do this every year. When I had the Rising Creek Bakery, we placed these elegant candies on top of cakes, scones, and used them as wedding decorations.

Here are directions:

1. Prepare a deep purple color sugar by pressing food color into granulated sugar. My best color comes with a combination of blue and red color.

Then crack an egg open and place only the whites in a shallow bowl.

2. Pick your violets in the afternoon when they are are open and dry. It helps to keep a stem on it to use as a “handle”.

3. Using a watercolor paint brush, gingerly coat the surface of the flower with egg white, then place in a pile of purple sugar. Gently cover the flower with more purple sugar and tamp down lightly to coat the entire surface.

4. Pick up via your stem handle and place your flower on a plate with petals splayed out. Let dry about a week.

5. Box these up to keep safe till ready to decorate.They will last until next year!

Ramps are free garlic and scallions wrapped in one.

I just learned to cut the bulbs low and leave the roots in place to reduce over harvesting.

I’ve been using ramps rampantly in my posts without talking about what they are. My long time friend Sue stopped me short by seriously asking “What are Ramps?” Ramps are famous in West Virginia so I forgot folks from the West coast have never heard of them. We have festivals and big community dinners around ramps. They signal spring in the hills of Appalachia.

Ramps are famous for the odor one acquires after eating a whole lot for days on end. That might be me this year. But who cares. COVID-19 gives me freedom to smell like ramps and not catch flack because Jim is eating them right along with me. In fact he is the one foraging for them. It’s a good thing. I’ve been out of garlic for 4 weeks now and these are a great substitute. I can’t vouch for their COVID-19 virus inhibiting properties but they might help with social distancing.

Recipes for ramps are easy to come by. Big named restaurants from East to West coast talk “woods to table” cuisine when they serve ramps in gourmet dishes. Epicurious has multiple ramp dishes. The web is full of them. But I just substitute ramps for garlic or onions in my favorite dishes. If it weren’t for ramps, I would have suffered much more deprivation in this pandemic. I love garlic and but hoarders cleaned out my grocery store.

Tonight’s Dinner: Scrambled Eggs with Ramps and Asparagus

If you follow that photo link to Scrambled Eggs with Ramps and Asparagus, you will see the recipe calls for morel mushrooms. I had morel mushrooms. But they are so precious to me that I would never bury them in eggs. That, to me, is sacrilegious. I will do a post on morels soon.

Fish Tacos with Pickled Ramps and Dandelion Greens

My husband Jim got motivated to try his fail-safe Fish Taco recipe with some wild substitutions: dandelion greens and pickled ramps. Jim can cook! We have always divided the cooking and cleaning for the last 40 years and it’s a toss-up who is better. What Jim is unquestionably better at is plant identification. I always run my foraged produce by him to make sure I have what I think I have picked and not something poisonous. He has caught me a couple of times – never on something poisonous. I’m not that dumb a dunce. We have a degree or two in Botany. However, he has spent his career immersed in Appalachian forests identifying plants, while I have not. I do not recommend anyone goes out and collects anything to eat all alone unless you are an expert. I think it’s wise to have an expert around. A Nona or Grandma will do if they are steeped in the heritage of foraging like mine was. An expert is someone who has, for years, eaten lots of what you’ve just picked and they are alive and well.

Back to Jim’s fish taco recipe. It’s a keeper in our household.

Jim’s Fish Tacos with Ramps and Dandelion Greens

Jim’s Fish Taco Recipe

Ingredients:

  • 1/2 cup ramps chopped into 1/4 inch pieces
  • 1 1/2 cups red wine vinegar
  • 1/4 cup olive oil
  • 1 1/2 teaspoons ancho chile powder
  • 1 1/2 teaspoons dried oregano
  • 1/2 teaspoon ground cumin
  • 1/4 cup lightly packed fresh dandelion leaves, chopped, plus more for garnish
  • 1 jalapeno, stemmed and chopped
  • 1 pound flaky mahi mahi
  • Salt
  • 8 fresh corn tortillas
  • Plain yogurt
  • Fresh tomato salsa
  • 1/3 cup radish sprouts (optional)
  • 2 limes, cut into quarters

Marinate the Ramps: Put ramps in a small bowl and pour in enough red wine vinegar to cover well. Set aside for 30 minutes or more.

Marinate the Fish: Pour the olive oil into a small bowl. Add the ancho chile powder, oregano, cumin, chopped dandelion, and jalapeno. Mix well. Place the fish on a dish and pour the marinade over it, making sure to coat the fish well on both sides. Marinate for 20 minutes.

Cook the Fish: Heat a frying pan on medium-high heat. Remove fish from marinade and place in hot pan. Season fish with salt. Cook fish for 4 minutes undisturbed, then turn over, and cook another 2 minutes. Remove pan from heat and flake fish into the pan with fork, making sure to mix in all the marinade that stuck to the bottom of the pan. Check for seasoning and add more salt if needed. Set aside.

Heat the Tortillas: Put 4 tortillas on a plate and sandwich them between two slightly dampened sheets of paper towel. Microwave on high for 45 seconds. Place the warm tortillas on a towel-lined plate and cover. Repeat with the remaining tortillas.

Assemble and Serve: We set up a buffet line with the tortillas, fish, ramps, yogurt, dandelion greens, salsa, and limes all in separate bowls with serving spoons so each person can make their own. The general rule is we grab a plate and place a spoonful of the marinated flaked fish onto the center of a tortilla, top with the marinated ramps, decorate with the yogurt, salsa, additional dandelion greens, radish sprouts, garnish with lime wedges and enjoy. We do three on each plate for starters.

Tips:

  • Dandelions grow in lawns, along roads, and along edges of disturbed areas. They are everywhere. It’s best to pick them before they flower but that never stopped me. Find the flowers and trace back to the base of the flower to the swirl of leaves that look like one in the taco recipe photo above (front right and center). They are best if you clip them above the fat stemmy part at the bottom. The leaf tips are what I harvest although the photo shows almost the whole stemmy part I usually cut off. Jim must have collected that one:)
  • If they are too bitter, you can boil them about 3 minutes and pour off the water. Taste again and if they are still too bitter, repeat.

Burdock Stems Taste Like. .

Burdock, that plant with the Velcro ball seed pods that get stuck in everything they touch, is food worthy. Yep. Hard to believe, but true. I read it is from Japan, brought here as a garden crop. In April, I found a patch along my roadside. I can just imagine what my neighbor Sarah was thinking when she drove by and saw me crouched in the ditch yanking on this big hunkin weed trying to pull it up. I had heard the roots are good (Japanese told me). Well, they might be. But I’ll have to wait until summer to find out. I pulled up all two-year-old plants with roots too old to be edible. So I went for the stems of the leaves. Stems are so much easier to gather than the roots.

Burdock Has Hairy Leaves with Silvery White Undersides (I almost confused it with the much smaller Yellow Dock)

To collect stems, I just snip them off and drop the leaves right on the ground, taking only the part from the stem-base to the leaf-base home. I lightly peeled these little stalks and boiled them for 20 minutes. They had the taste and texture that reminds me of fresh artichoke hearts. I served them with butter and salt. Such a taste treat and simple to collect and cook.

Boiled Burdock Stems with Butter and Salt

Mint Julep

All my roads in spring and summer eventually lead to mint juleps for as long as I can remember. Was I four or five years old and picking mint with my toddler sister on Loft Mountain so the grownups could have their mint juleps? Traditionally all of Daddy’s family would gather on Loft Mountain on the Blue Ridge Parkway at least once a summer to picnic and drink mint juleps. We chose a picnic table with mint growing wild all around. The mint was much more important than the view. It is still family tradition to fix mint juleps in mason jars with fresh picked mint from someone’s yard at summer reunions. Last summer, Cousin Ken made sure we celebrated Daddy’s 96 years of wonderful life with a round of mint juleps at his memorial dinner.

Appalachian Spring Mint Julep

Here is my mint julep. I had to taste test it to make sure I got the recipe to my liking. I like mine on the sweet side. Cousin Ken cuts the simple syrup to a teaspoon each of water and sugar. In fact he doesn’t even bother making simple syrup. He puts the sugar straight in the jar to mull the mint.

I upgraded from a mason jar. Here is my recipe. First I make simple syrup by putting one Tablespoon of sugar and one Tablespoon of water in my glass and microwaving it for 15 seconds. Then I stir the solution til all sugar is dissolved. Then I put in two hearty sprigs of fresh mint and bruise the mint with a wooden spoon in the sugar water. I then add crushed ice to the top of the glass. Next I pour in a jigger of bourbon all over the crushed ice. I stirrrr and then top off with more crushed ice and a small mint sprig. I stir gain and bury my nose in the glass. That smell brings back many fond memories of family picnics on Loft Mountain and gourmet summer dinners with MaryBeth who loves a good mint julep as much as I do. Cheers to you and all you hold dear!

Comfort Food Using Spring Greens

Chicken Casserole With Spring Greens

It’s mid April in Appalachia. The leaves are not out on the trees. But the forest floor and fields are bursting with spring. I’m so jazzed each day with the free food options all around.

I used to go foraging as a teenager back in Central Virginia. Living on a wooded farm nestled against the Southwest Mountains, I had acres and acres to roam, just me and the family Saint Bernard, Beau. I would sit under trees surrounded by things I’d picked, a flower book and Euell Gibbons’ Stalking the Wild Asparagus trying to figure out what was what and what I could eat. Then I would go home and try to cook something from what I collected. I distinctly remember burning up one of Mom’s pans trying to boil greens. I guess I haven’t changed much in the last 50 years in the foraging department. But I am a much better cook.

I hid about a pound of free, fresh picked dandelion greens in this chicken casserole for two (it could serve 4 with side dishes). This is comfort food for sure. It reminded me of Mom’s cooking with Campbell’s mushroom soup back in the day. The veggies are muted by the chicken and white sauce. Like a smoothie tricks kids into eating fruits and vegetables; if I hadn’t cooked this I wouldn’t guess we were eating so many greens.

This is the recipe I used from Epicurious. It’s actually from Bon Appetit May 2009. I doubled the chicken and substituted half and half for the cream and added 1/4 cup of Parmesan cheese to the breadcrumb topping.

Cattail Shoots

Cleaned and Ready Cattail Shoots

Now this is a taste treat! In mid March to mid April, cattails start sending up their leaves in spikes through wetland soil. I find them easy to collect. I have this favorite pair of scissors with thin sharp blades that help me spear and slice under the soil to capture as much of the crisp white shoots as possible. I can be found crouched in the swamp in my waterproof boots knuckle deep in the wetness harvesting the first spires of spring in the wicked cold. Today the snow was flying. I had to laugh. Who does this! But hey, free food! And it IS gourmet!

To harvest, I cut below the soil level and then peel off the outer leaves and snip of the top green tough part right there in the swamp. That means I have less to do back in my kitchen. At my sink, I wash off the shoots and peel off any tough leafs. What’s left is tender and crisp, with a delicate flavor reminiscent of cucumbers.

Cattails in Late Summer

Tonight I got my husband Jim’s stamp of approval with this cattail salad recipe. He ate all the leftovers. That just makes me happy. So here’s the recipe. I need to get better at keeping records of how much I put of what. I’m new to this blogging thing so I’m a bit rough. Here goes.

Ingredients: all those cattail shoots in the photo cut on the diagonal, a large handful of cherry tomatoes cut in half, 4 ramps white and pale green parts finely chopped, two hefty sprigs of fresh mint finely chopped, 2 Tablespoons of red wine vinegar, 1 teaspoon sugar, 1 Tablespoon of olive oil. Mix this all together and serve. It’s enough for two.

Cattail and Tomato Salad with Ramps and Mint

You Can Eat That?

Spring Beauty

I almost hate to admit that I love the taste of this delicate spring ephemeral. Spring Beauties make a mild salad base, just like lettuce. I pick them by pulling them out of the leaves. They tend to break off cleanly below ground. I leave at least three plants for every three plants I pick. I want them to come back next year. These beauties substitute for spinach in most any recipe. I hate to harvest many though. They are soo pretty.

I eat the flowers, leaves, stems and all. But my newest discovery has me so excited! I made a pesto where one cup of the 4 cups of spring greens was spring beauties. That pesto was definitely gourmet. The recipe for my pesto is coming. Since I didn’t measure anything when I made it, I need to make it again and be more of a scientist about it. Now all I can say is- here is a rough estimate and it was Delicious!!

Wild Wonderful April Pesto with Cattail Shoots, Violets and Parmesan as Garnish
Clockwise From Top Right: Garlic Mustard, Purple and Yellow Violets, Chickweed, Spring Beauties, Dandelion Leaf Tips, Purple Dead-nettle, and Cutleaf Toothwort

Wild Wonderful April Pesto

Ingredients : 3-4 cups spring greens lightly packed, 3/4 cup toasted pecans, two whole ramps greens to bulbs, 1/2 cup (plus 1/4 cup more for garnish) grated Parmesan cheese, 1/4-1/2 cup or more olive oil to bring to desired pesto consistency, salt to taste.

Blend (I used a Vitamix) throughly til smooth and spring green. Serve over pasta garnished with violets and/or yellow dandelion flower petals and Parmesan cheese

For the spring greens mixture I use what I have. The last time I made it, I used about a cup of spring beauties, a cup of dandelion leaf tips, a cup of daylily stem bases and a mixture of garlic mustard, cutleaf toothwort, violet flowers, purple dead-nettle, wood sorrel, and chickweed. I went light on my least favorite greens: garlic mustard and toothwort. I feel obligated to pull as much garlic mustard up as I see because it is an invasive. I wish I liked it- But Yuck! So not much of that.